SUMMARY:
Cloud engineers can optimize end-user performance and decrease sign-in times in an Azure Virtual Desktop (AVD) environment by implementing FSLogix Profile Containers, which store user profiles in mounted VHD(X) files backed by Azure Files storage.
- Successful implementation requires creating a globally unique Azure Storage Account, enabling Active Directory authentication, and connecting the account to a domain using the
join-AzStorageaccountForAuthPowerShell command. - The deployment mandates assigning two specific role-based access control (RBAC) rights: Storage File Data SMB Share Elevated Contributor for administrators to set NTFS permissions, and Storage File Data SMB Share Contributor for all end-users.
- After installing the FSLogix software on the AVD session hosts, the configuration is finalized by manually editing the registry to set the
Enabledvalue to ‘1’ and defining the file share’s UNC path using the VHDLocations key.
This comprehensive, multi-step process establishes the necessary cloud infrastructure and software configuration to ensure user profiles are correctly containerized and tested within the AVD host pool.
Table of contents
- SUMMARY:
- Step 1: Create a new resource group to store resources.
- Step 2: Create a Storage account
- Step 3: Create a File Share
- Step 4: Enable Active Directory authentication on the Storage account.
- Step 5: Configure Storage account Access control (IAM)
- Step 6: Configure NTFS rights on the Azure File Share
- Step 7: Create your Azure Virtual Desktop Session Hosts
- Step 8: Install FSLogix Profile Container in your AVD host pool.
- Step 9: Test the results
Implementing FSLogix within your Azure Virtual Desktop environment provides an optimized experience for your end users. For example, a non-persistent Pooled Windows AVD host pool will allow the user to have a decreased sign-in time because user profiles are stored in the VHD(X) file that gets mounted every time the user signs into the session host.
You can implement this in various ways, but I will show you how to do this with Azure Files in this blog. Azure Files is an Azure service that allows you to scale it on-demand, and it doesn’t depend on a VM running at all times like having a typical Windows File Server.
Below is a quick summary of deploying an FSLogix Profile container using Azure Files.
- Create a Storage Account with a Private Endpoint
- Create a File Share in the storage account
- Enable Active Directory Authentication on the storage account
- Configure access control in the storage account and NTFS permissions of the Azure File Share
- Install FSLogix in your AVD host pool
- Test the results.
Note: Depending on your setup in Azure, you can configure FSLogix to work via a GPO. In this blog, I will be deploying a basic AVD setup, and I plan to go into further detail about FSLogix and GPO configurations.
Step 1: Create a new resource group to store resources.
Login into your Azure Portal Account to perform the steps provided below.
Once you have logged into your Azure Portal, search for Resource Groups, click + Create, and then fill in the required information. Once you are finished entering the details, click Review + create.
Note: With any resource group I create, I like to follow Microsoft’s naming convention recommendations in the Microsoft doc below.
Recommended abbreviations for Azure resource types – Cloud Adoption Framework | Microsoft Docs
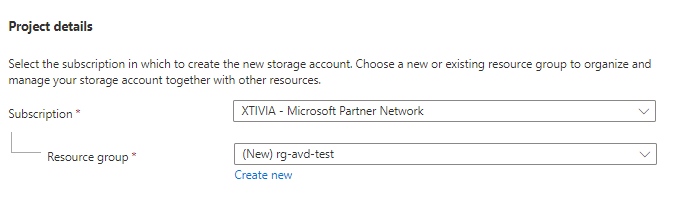
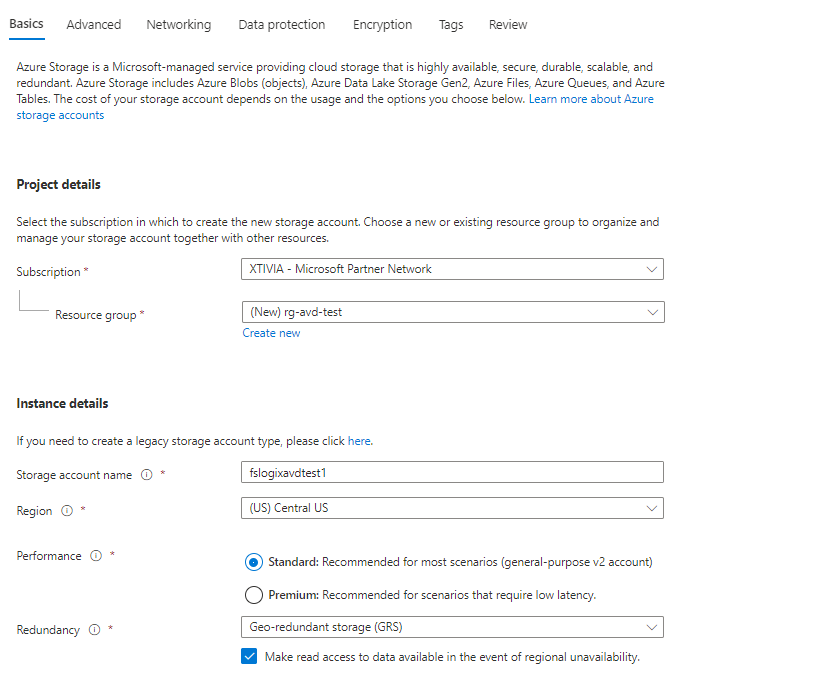
Step 2: Create a Storage account
Once your resource group is created, create a new storage account. You can search for Storage Account or click it on the left-hand resource blade.
Select your Subscription and resource group that you just created, and if you haven’t made one, choose the option to create a new one. Next, give the storage account a name; it must be globally unique and select your Azure location.
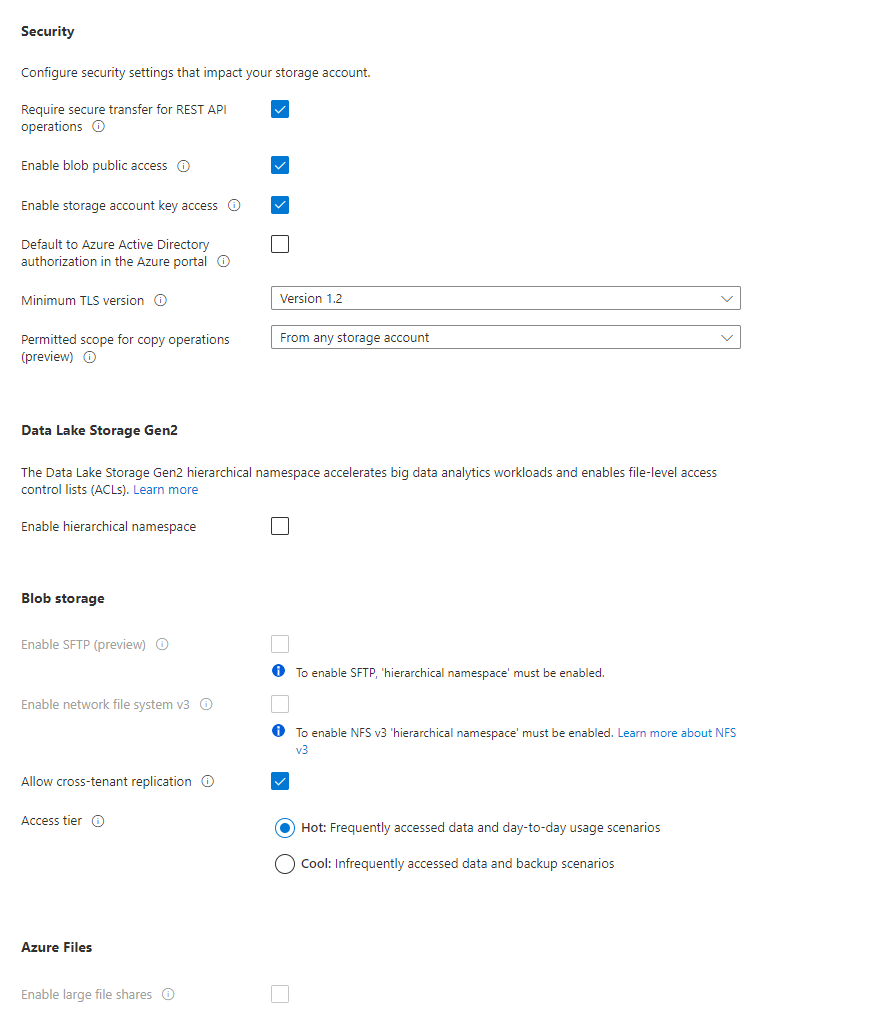
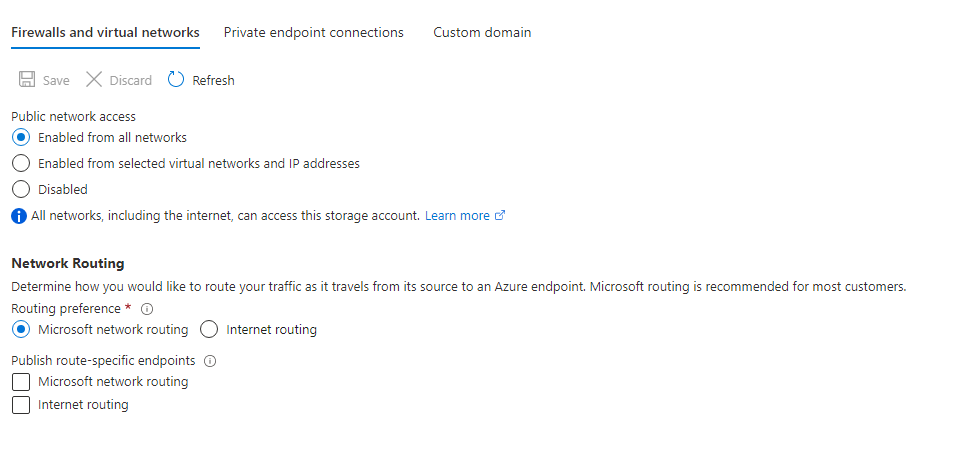
Click on the Advanced tab and go through any additional settings you want to configure for this storage account, but we will use the default options for this example. Once finished reviewing the Advanced settings, click on the Networking tab.
Select the preferred Network connectivity you want to use; in this example, I will leave the default settings since this is a lab environment. In a real-world scenario, you will want to use a Private Endpoint connection or set specific access from selected virtual networks or IP addresses. I will later cover Private Endpoint configurations with storage accounts in a later blog.
Continue through the next tab, Recovery, and in my example, I am using the default settings.
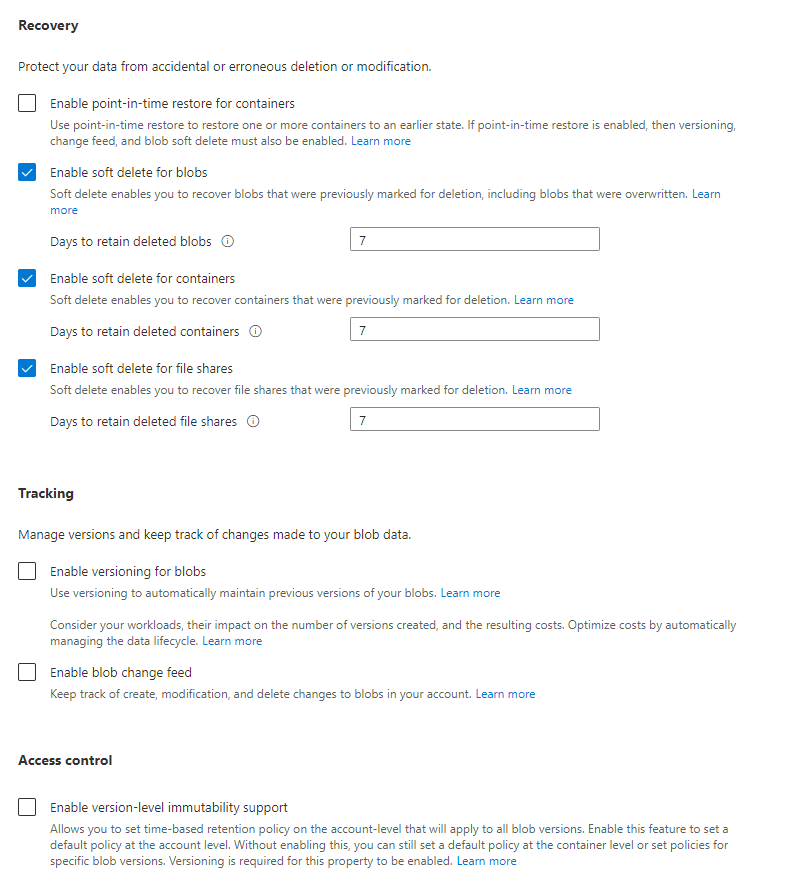
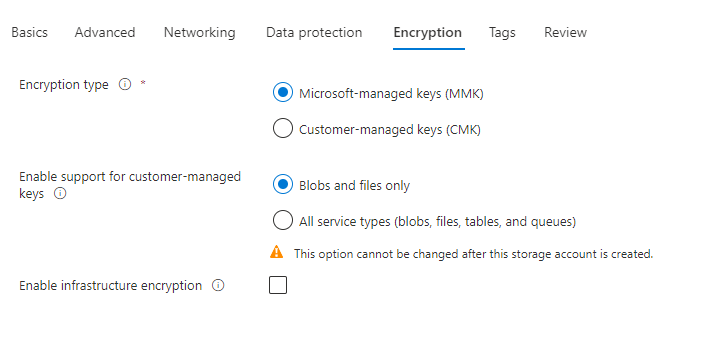
Once finished, click on Encryption, and in this example, I am using the default settings.
Step 3: Create a File Share
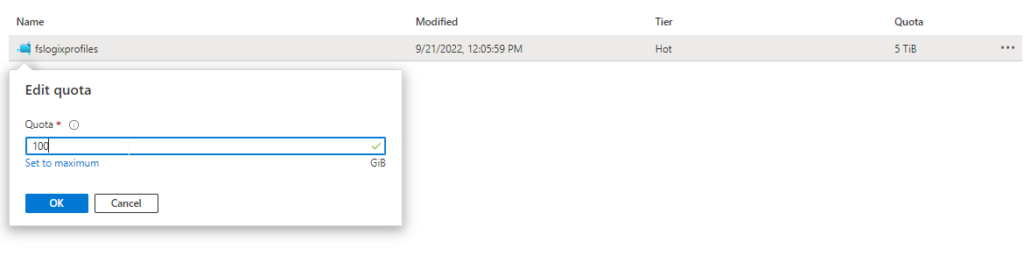
Go to your newly created Storage account, click + File Share, and fill in the required fields. For this file share, I will use the Hot tier for Storage.
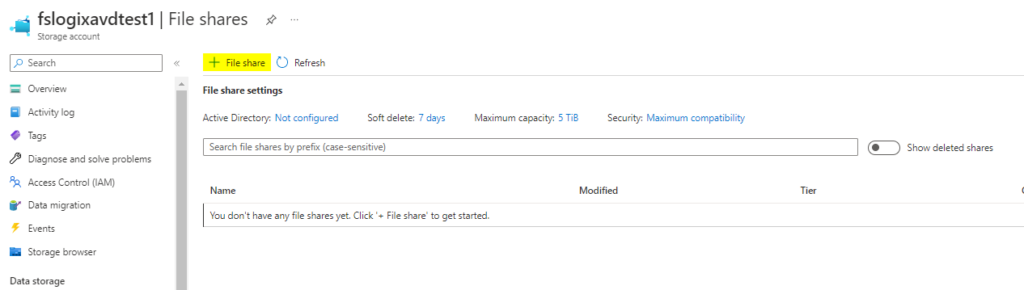

Once the new file share is created, you can use the default quota that is set to 5 TiB or edit the quota to a specific amount. For my example, I will use 100 GB.
Step 4: Enable Active Directory authentication on the Storage account.
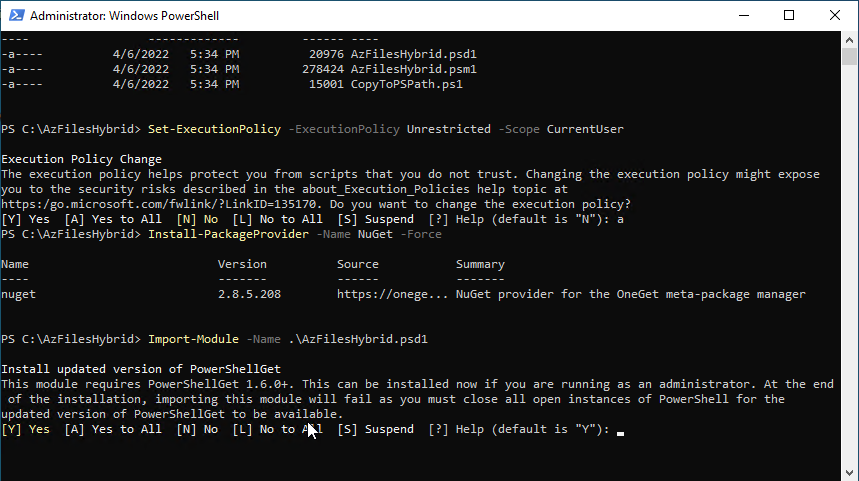
You will need to log in to a VM where you can connect to the Storage account to be able to set permissions. In my example, I have set up a domain controller in Azure with my domain, so I can access Active Directory Users and Computers to complete the steps below. Download the AzFilesHybrid PowerShell module from here. After downloading, unzip the file to a folder like c:\AzFilesHybrid.
Start an elevated PowerShell prompt and run the following commands:
Set-ExecutionPolicy -ExecutionPolicy Unrestricted -Scope CurrentUser
Install NuGet by running the following command:
Install-PackageProvider -Name NuGet -Force.
Within the PowerShell prompt, navigate to c:\AzFilesHybrid, and run the following command:
Import-Module -Name .\AzFilesHybrid.psd1
Type A for Yes to All
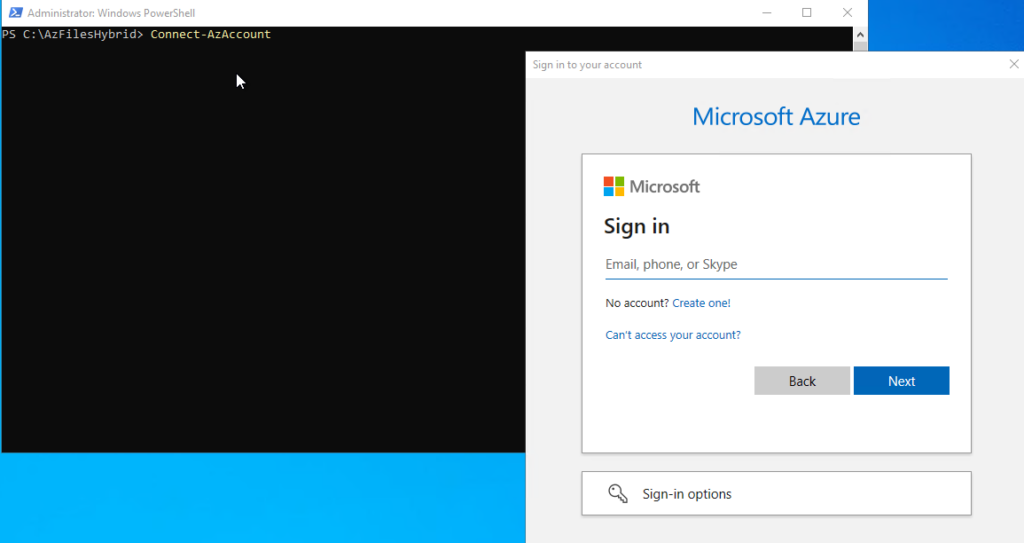
Connect to Azure via PowerShell by running the following command:
Connect-AzAccount
Select an Azure Subscription by running the following command:
Select-AzSubscription -SubscriptionName "<your subscription name>"

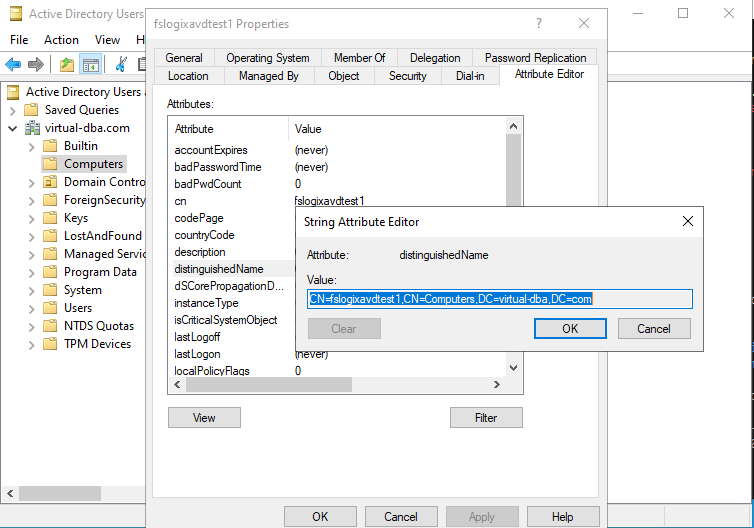
To connect the Storage account with Active Directory, run the following command:
join-AzStorageaccountForAuth -ResourceGroupName "<Resource Group Name>" -Name "<Storage Account Name>" -DomainAccountType "ComputerAccount" -OrganizationalUnitDistinguishedName "<OU Distinguished Name>"
My example will be
join-AzStorageaccountForAuth -ResourceGroupName "rg-avd-test" -Name "fslogixavdtest1" -DomainAccountType "ComputerAccount" -OrganizationalUnitDistinguishedName "CN=Computers,DC=virtual-dba,DC=com"
If you are having issues finding the Organizational Unit Distinguished Name go into View – Advanced Features – Active Directory Users and Computers – Attribute Editor – distingushedName
I am going to connect this storage account into the Computers OU. You can pick any OU that works for you.
After you have your script ready, run the above command, and your results should show below.

Close the PowerShell prompt and check in Active Directory Users and Computers if it now shows a computer account object.
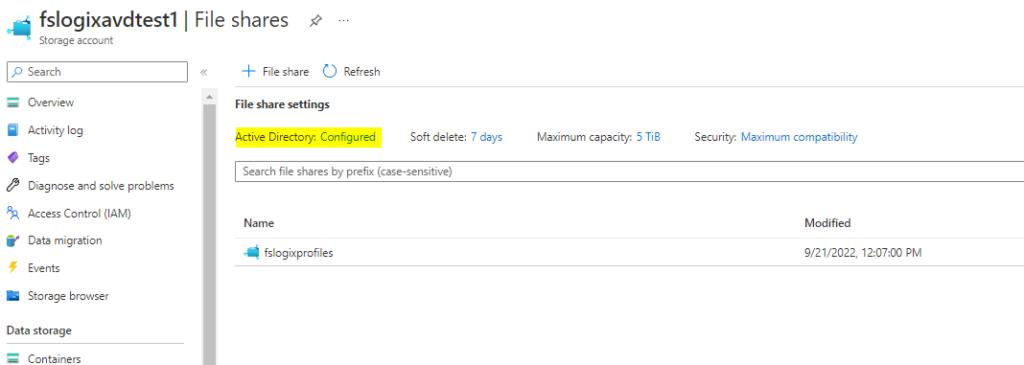
In Azure, if you go back to the Storage account – File shares, you will see that it shows Active Directory configured.
Step 5: Configure Storage account Access control (IAM)
Permission will now be granted to the Storage account; there must be an Administrator or a group of administrators with the Storage File Data SMB Elevated Contributor rights to set NTFS permissions on the file share. Next to the Administrator, all users that will utilize the FSLogix profile container need to have Storage File SMB Share Contributor rights.
To make things cleaner, I created two AD Security groups and have added my Administrator accounts to the FSLogix Share Elevated Contributor security group and my regular user test accounts to the FSLogix Share Contributor security group.

Navigate to the Storage Account within the Azure portal and open the Access control (IAM) blade and click Add role assignment.
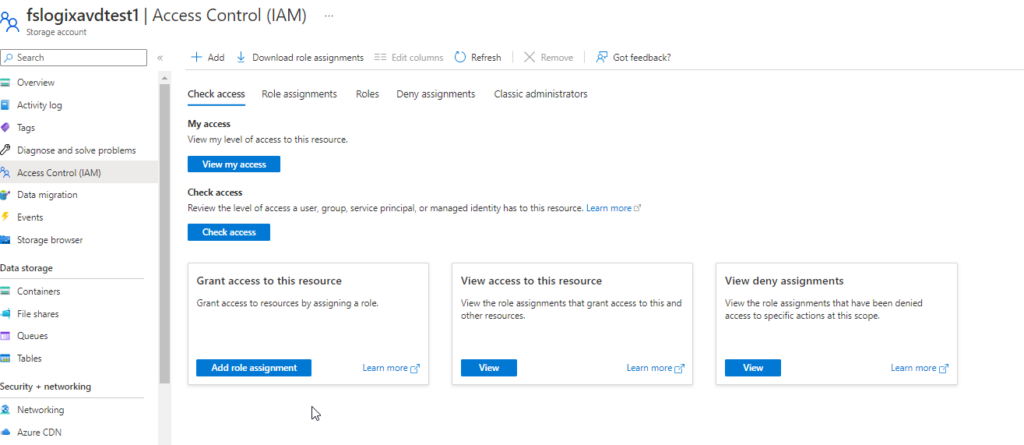
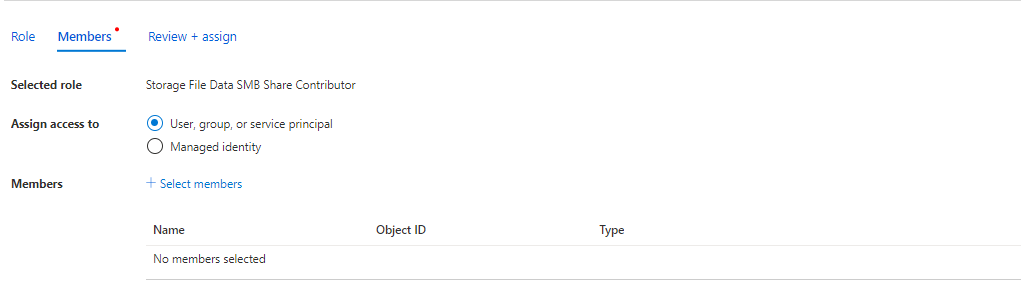
In the search, find the role Storage File Data SMB Share Elevated Contributor and then add the security group or users you have created and then do the same for Storage File Data SMB Share Contributor.

Step 6: Configure NTFS rights on the Azure File Share
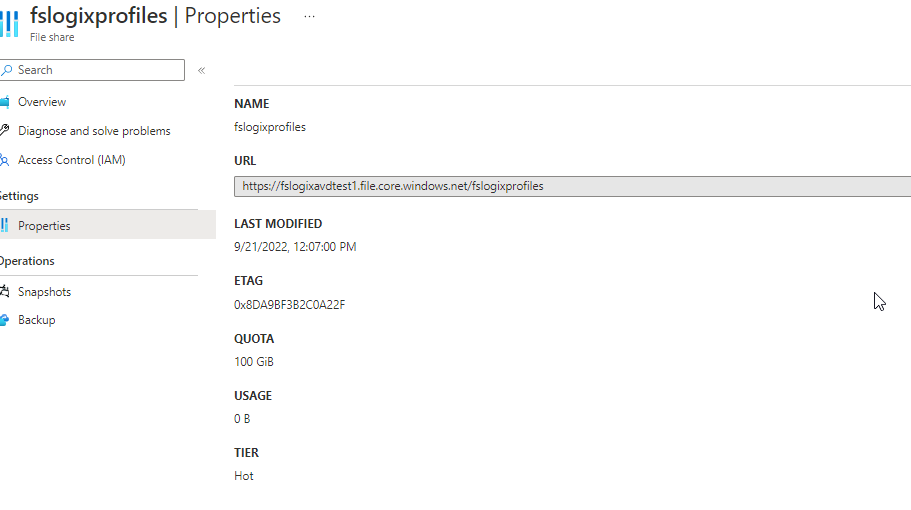
We will now need to set rights on the NTFS level, but we need to obtain the full UNC path of the file share. You can get that by going to the Storage account – File share – “Name of File share” – properties.
Open up a text editor of your choice and remove the “https://” and replace it like the below, and then open up File Explorer and map the file share.
\\fslogixavdtest1.file.core.windows.net\fslogixprofiles
In File Explorer, click on Properties, the Security tab, and Advanced. I have added the two security groups I created earlier FSLogix Share Contributors (this will be my FSLogix Users for AVD) with modified access and FSLogix Share Elevated Contributors with Full control access.

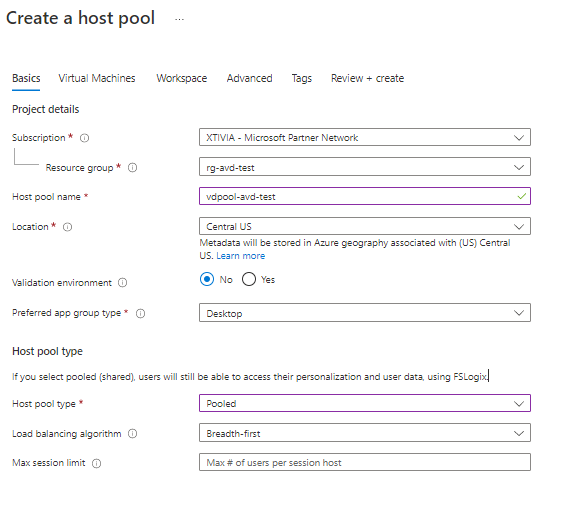
Step 7: Create your Azure Virtual Desktop Session Hosts
Fill out the required fields under the Basic tab. I have provided a screenshot of my configuration. For my example, I am using Pooled and Breadth-first.
On the Virtual Machines tab, you can decide if you want to have the VMs deployed now or if you can do it later. In my example, I will configure the VMs to be deployed. In a normal Azure Virtual Desktop deployment, I would set up a master image and use that to deploy everything. I will do a future blog on deploying AVD with a master image. The image you will want to use is Windows 10 or Windows 11 Multi-session. For my example, I chose Windows 11 Multi-session.

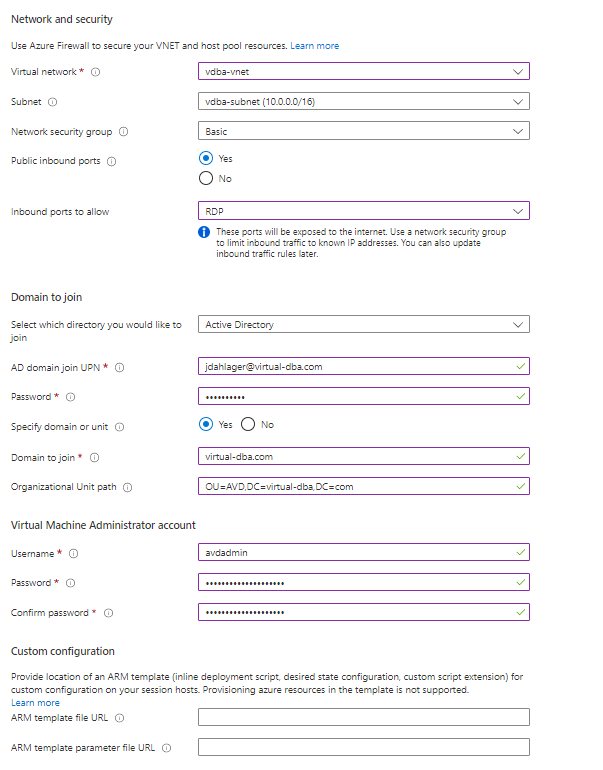
Under the Network and security tab, fill out the required information. In my example, I will have the deployment domain join the session hosts to my test domain. I also have set an Organizational Unit path where the computer objects will be stored in Active Directory. This AVD deployment will have public access VMs since this is a lab environment, but in a production deployment, you should have this locked down without public access.
On the next tab, Workspace decides if you want to have a desktop app group. For my example, I am going to create this new Workspace. So go ahead, tab the rest of the settings, and click Review and create.

Confirm deployment finished.

Active Directory
Step 8: Install FSLogix Profile Container in your AVD host pool.
In my example, I deployed two session hosts; however, it is better practice to deploy this using a master/gold image. As I mentioned, I plan to do a future blog using a master/gold image with AVD. If you don’t have a master/gold image, you will have to log in to your session host VMs and manually download the latest FSLogix software. You can get that by going here.
Next, navigate to the resource group where your session hosts live and RDP into the AVD session VM. My example session hosts are domain joined with my lab domain configuration. This configuration will work the same if you are a hybrid setup with native Domain Controllers in Azure. I downloaded the FSLogix software and copied and pasted it to my two example session hosts.
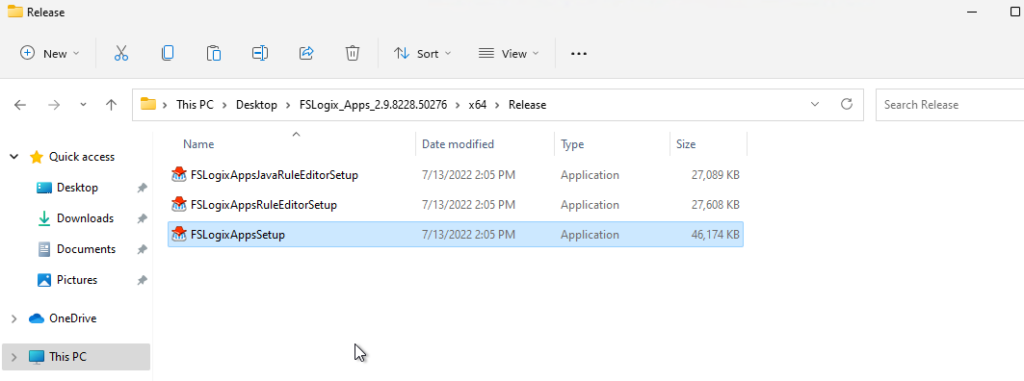
Once you have moved the zipped folder over to the session hosts, extract the package, navigate to X64 – Release, and run FSLogixAppsSetup.
Click Install.
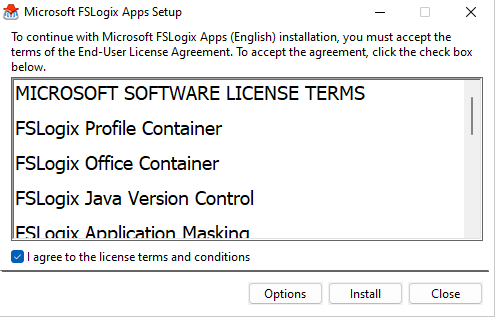
Once the installation is finished, click restart.

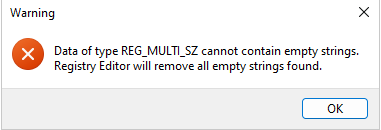
Once the session host, VM has restarted, RDP back into and open up Registry Editor and navigate to HKEY_LOCAL_MACHINE\Software\FSLogix\Profiles. Right-click on Profiles and create a “DWORD (32-bit) Value” named “Enabled” with its value set to 1. You then need to set the location for the VHD encased profile data. Right-click on Profiles again, create a “Multi-String Value” named “VHDLocations,” and change it to your file server UNC path.
If you see an error message when you hit enter from entering the “Mult-String Value,” just click OK. This is where the permissions that we set up for the FSLogix users will come into place. Once you have finished, restart the session host VM to ensure all Registry settings changed get configured.

One additional registry configuration I like to make is to add FlipFlopProfileDirectoryName. This is one of my personal preferences, but it will present things cleaner with the FSLogix profiles. I have provided a link below with additional registry configuration settings you can add for your FSLogix setup.
FSLogix Profile Container registry configuration settings – FSLogix | Microsoft Learn
FlipFlopProfileDirectoryName
Type DWORD
Default Value 0
Data values and use
When set to ‘1’, the SID folder is created as “%username%%sid%” instead of the default
“%sid%%username%.” This setting has the same effect as setting SIDDirNamePattern = “%username%%sid%” and SIDDirNameMatch = “%username%%sid%”.
Step 9: Test the results
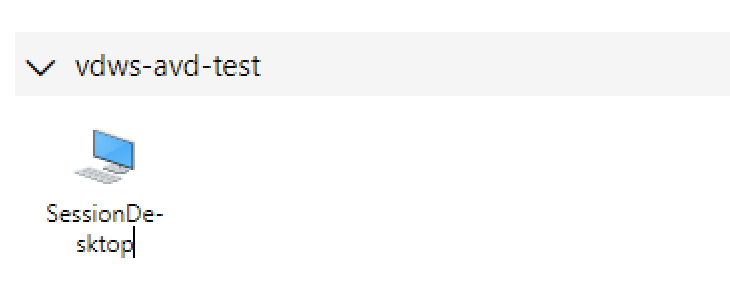
In my test, I have created three users in my Azure portal, and I will go ahead and sign onto one of the session hosts via the link Microsoft provides in this doc below.
Connect Azure Virtual Desktop with the web client – Azure | Microsoft Learn.
For the example, I used
https://rdweb.wvd.microsoft.com/arm/webclient/index.html
If you are having issues where your AVD users aren’t able to connect to any session hosts, there are two roles that the users need to be assigned to, which are Desktop Virtualization User & Virtual Machine User Login.
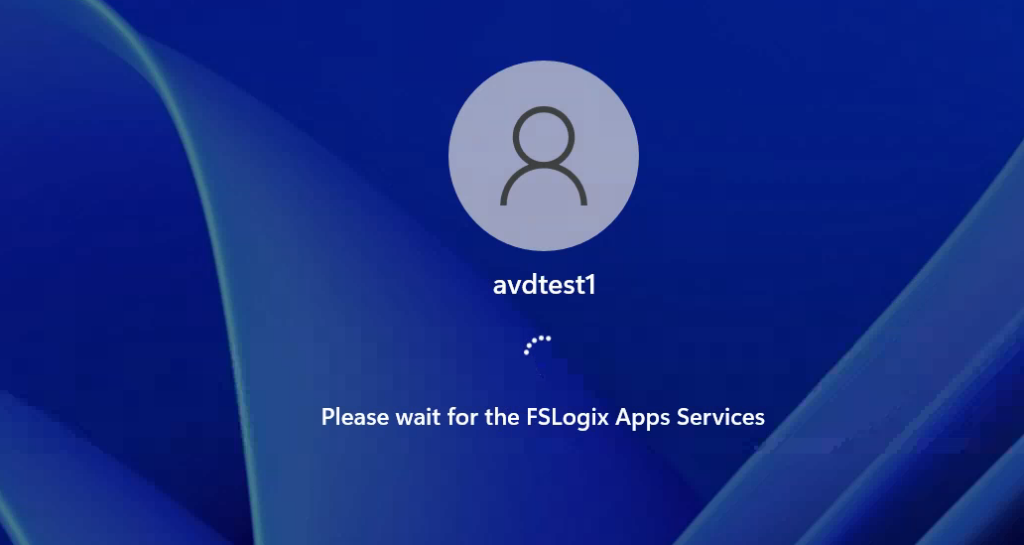
I signed as my test users avdtest1, avdtest2, and avdtest3.
FSLogix App Services will display.
I went back to my storage account, and the three test users I used, profile directories, are showing up in my storage account.

In the session host VMs, I went into Computer Management the user profiles are showing up.

Once I signed off the session host VMs the disk profiles disappeared as expected.
This was a simple guide on how you can create a quick test environment if you want to implement FSLogix with Azure Virtual Desktop. I will have a separate blog for FSLogix troubleshooting that will be helpful when issues arise.
As mentioned in a previous blog, there are many benefits of using FSLogix, but if you want to implement this for your business, please reach out to us, and we will be more than glad to help. I plan to make more blogs on different implementations with Azure Virtual Desktop, like hosting custom apps through MSIX or Microsoft Endpoint Manager. Different configurations with Azure Active Directory Domain Services and other things you can use AVD for.