There may be a situation where you want to remove a node out of an Availability Group (AG) may be due to testing, something wrong with the server and need to build a new one, running out of space on that server so you can move files around, move the server to a different subnet, etc. So, for whatever the reason it may be, it is easy to take that node out and add it back later. If you want to remove a node from an AG due to wanting to move that node to a different location or you need to replace the server, go to this URL for those instructions. This is a great resource if you want to remove a node from an AG due to wanting to move that node to a different location or you need to replace after the new server has been built.
Removing a node from an AG
If you decide to temporarily remove the node from the AG, follow these instructions. If you have a three-node cluster, where the node you want to remove is set to synchronous and the other is set to asynchronous, you should consider setting the remaining node as synchronous if your bandwidth can handle the traffic and then change it back after you add the removed node back. If you have a slow network, then leave it as asynchronous since you do not want to impact the primary server.
1. Open SSMS. Connect to the Primary server.
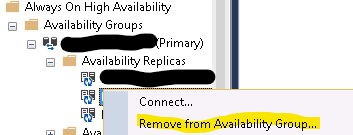
2. Expand Always On High Availability, Availability Groups and the AG you want to remove the node from. Expand Availability Replicas. Right-click the node you want to remove from the AG and click Remove from Availability Group… Click OK.
3. Verify the node was removed. Connect to Primary if you are not already connected to it.
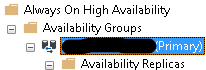
a. Expand Always On High Availability, Availability Groups and the AG you removed the node from. Expand Availability Replicas. Verify the node is gone.
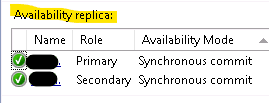
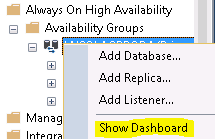
b. OR you can open the Dashboard and verify it there. Expand Always On High Availability, Availability Groups and the AG you want to add the node too. Right-click Availability Replicas and click Show Dashboard. Look at the Availability replica and it will show you what nodes are part of the AG.
Adding a node back to an AG
1. Verify the node is part of the cluster
a. Open Failover Cluster Manager. Connect to the cluster. Expand Nodes. Verify the node you want to add back into the AG is still part of the cluster and the status shows as Up.
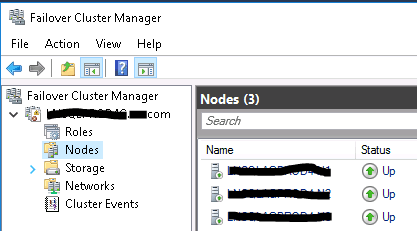
i. If it is not, then you need to add it back in BEFORE you add the node to the AG. Make sure and verify the cluster after you add it back.
2. Open SSMS. Connect to the Primary server.
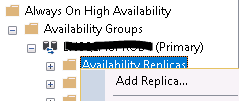
a. Expand Always On High Availability, Availability Groups and the AG you want to add the node too. Right-click Availability Replicas and click Add Replica.
b. Click Next in the Introduction window.
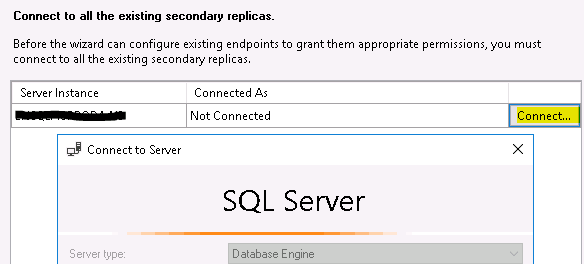
c. Click on Connect to Connect to all the existing secondary replicas. Click Next.
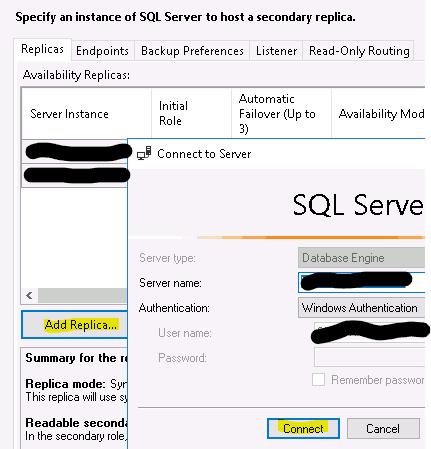
d. Click Add Replica… to add the node back into the AG. Select the SQL Server you want to add to the AG and click on Connect.
e. On the Replicas tab, set options for Automatic Failover (Up to 3), Availability Mode, Readable Secondary that you want for the new node.

f. Look at Endpoints, Backup Preferences, and Read-Only Routing (SQL 2016 and higher) tab. Verify the settings.

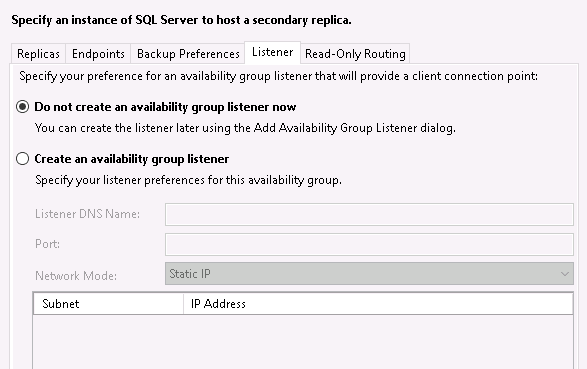
g. On the Listener tab, if the node you are adding back is on the same subnet, click on Do not create an availability group listener now. Or if it is on a different subnet, click on Create an availability group listener by adding the needed information. Click Next.
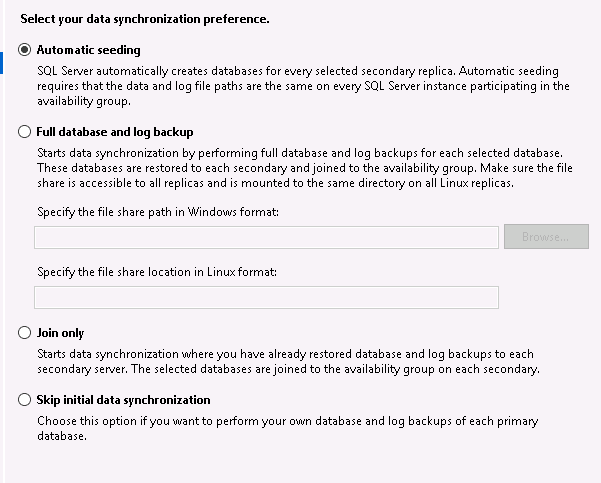
h. At the Select your data synchronization preference window, check the option of Automatic seeding, Full database, and log backup, join only or skip initial data synchronization. Click Next.
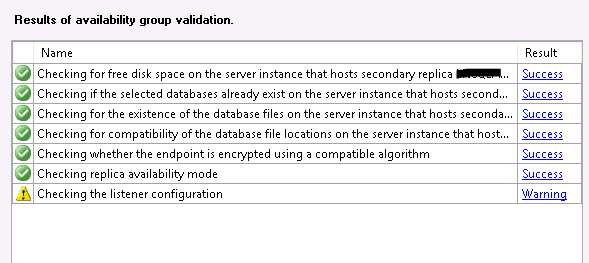
i. If you choose to not create the listener, you will see a warning for Checking the listener configuration. That is expected. Click Next.
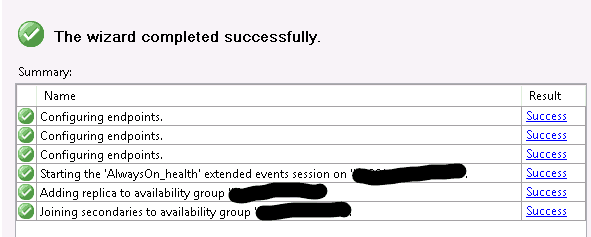
j. Click Finish. Once the node is added back to the AG, you will see the results as Success. Click Close.
3. Verify the status of the databases. Open the dashboard and verify all nodes are Synchronized.
a. Expand Always On High Availability, Availability Groups and the AG you want to add the node too. Right-click Availability Replicas and click Show Dashboard.
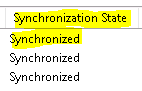
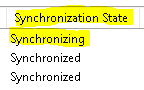
b. Verify the Synchronization State.
i. If a node has Availability Mode set to Synchronous Commit, then the state will show as Synchronized.
ii. If a node has Availability Mode set to Asynchronous Commit, then the state will show as Synchronizing.
Summary
Removing and adding a node back into an AG is fairly straight forward. If you have very large DBs, then I would recommend restoring the differentials then the transaction log backups to get it to a point where you can easily add that DB back to the AG. The database MUST be in Restoring status in order to add it back into the AG.Look at your backup chain, find your transaction log backups and load them. You can script out the restore or use the GUI to load the transaction logs. Via the GUI, on the secondary, right-click on the DB that shows Restoring, click Tasks, Restore, Transaction Log. Once you restored all of the transaction logs, keep the database in RESTORE WITH NORECOVERY. The database has to be in Restoring status in order to join it.