
Starting from Oracle19c cloning your oracle home is a bit different, whether you use this method for out of place patching or rolling out patches to multiple servers we no longer use clone.pl, instead oracle recommends using the software-only install option, available in the runInstaller command. Below are the steps to follow for a RAC environment:
Here are my environment details:
ORACLE_HOME = /u01/app/oracle/product/19.0.0/db_1
CLONED_ORACLE_HOME = /u01/app/oracle/product/19.0.0/db_clone
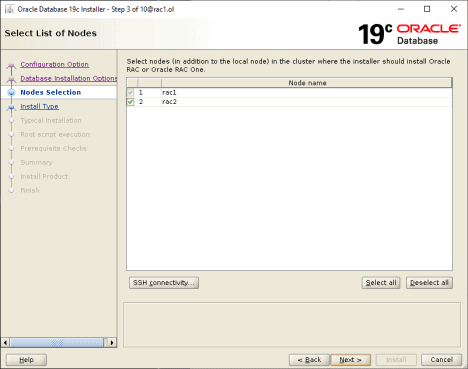
RAC NODES = rac1, rac2
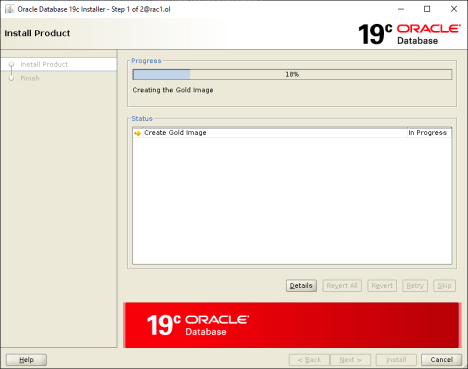
1. Go to your oracle home and execute the runInstaller command, setting your destinationLocation to where the image will be saved.
# cd $ORACLE_HOME

# ./runInstaller -createGoldImage -destinationLocation

/u01/app/oracle/product/19.0.0

Launching Oracle Database Setup Wizard…
# ./runInstaller -silent -createGoldImage -destinationLocation $PATH
2. Unzip the image to your new oracle home
# cd /u01/app/oracle/product/19.0.0

# ls -l

drwxr-xr-x. 69 oracle oinstall 4096 May 11 15:46 db_1

drwxr-xr-x. 68 oracle oinstall 4096 May 18 15:58 db_clone

-rw-r--r--. 1 oracle oinstall 3068280989 May 18 15:49
db_home_2021-05-18_03-46-32PM.zip
# unzip db_home_2021-05-18_03-46-32PM.zip -d

/u01/app/oracle/product/19.0.0/db_clone
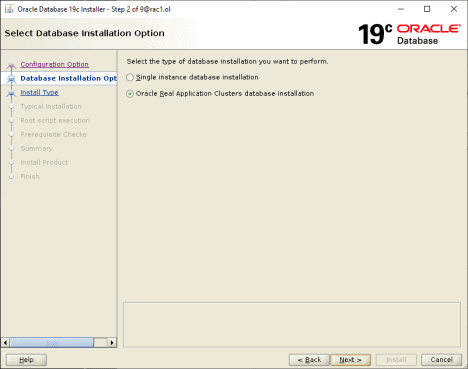
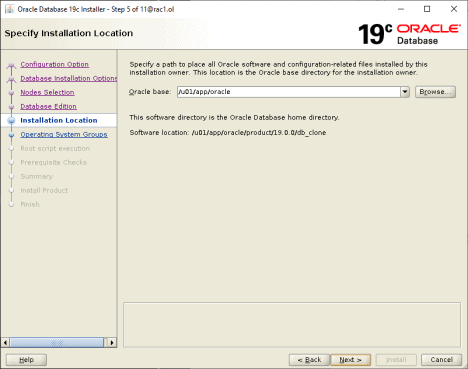
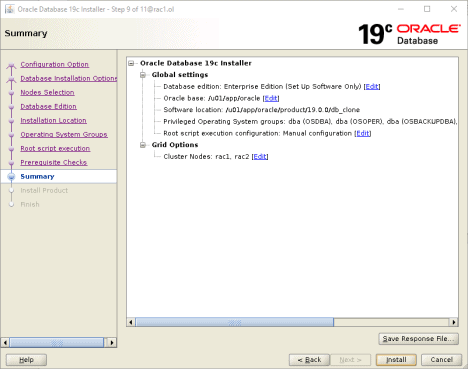
3. Go to the new oracle home and execute the runInstaller then follow the GUI or using the silent install.
Using the GUI
# cd /u01/app/oracle/product/19.0.0/db_clone

# ./runInstaller

Launching Oracle Database Setup Wizard…
a. Select “Set Up Software Only”
Using the silent installation
a. Execute the runInstaller command with the below parameters
# ./runInstaller -ignorePrereq -silent \
oracle.install.option=INSTALL_DB_SWONLY \
UNIX_GROUP_NAME=oinstall \
ORACLE_HOME=/u01/app/oracle/product/19.0.0/db_clone \
ORACLE_BASE=/u01/app/oracle \
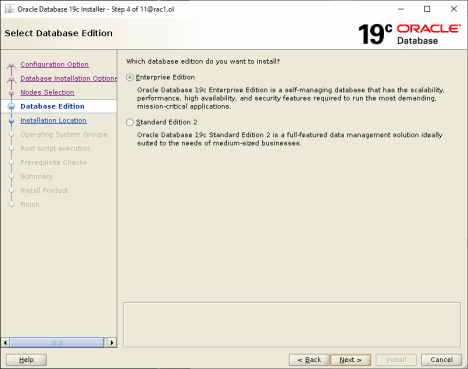
oracle.install.db.InstallEdition=EE \
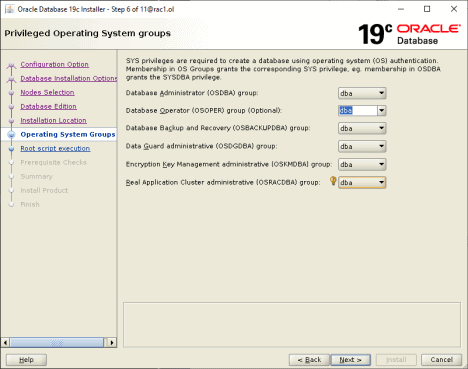
oracle.install.db.OSDBA_GROUP=dba \
oracle.install.db.OSOPER_GROUP=dba \
oracle.install.db.OSBACKUPDBA_GROUP=dba \
oracle.install.db.OSDGDBA_GROUP=dba \
oracle.install.db.OSKMDBA_GROUP=dba \
oracle.install.db.OSRACDBA_GROUP=dba \
oracle.install.db.CLUSTER_NODES=rac1,rac2 \
DECLINE_SECURITY_UPDATES=true
Launching Oracle Database Setup Wizard...
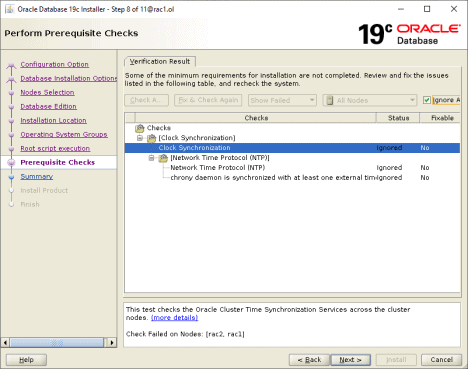
[WARNING] [INS-13013] Target environment does not meet some mandatory requirements.
CAUSE: Some of the mandatory prerequisites are not met. See logs for details. /u01/app/oraInventory/logs/InstallActions2021-05-18_04-23-48PM/installActions20 21-05-18_04-23-48PM.log

ACTION: Identify the list of failed prerequisite checks from the log: /u01/app/oraInventory/logs/InstallActions2021-05-18_04-23-48PM/installActions20 21-05-18_04-23-48PM.log. Then either from the log file or from installation manual find the appropriate configuration to meet the prerequisites and fix it manually.
The response file for this session can be found at:
/u01/app/oracle/product/19.0.0/db_clone/install/response/db_2021-05-18_04-23-48 PM.rsp
You can find the log of this install session at:
/u01/app/oraInventory/logs/InstallActions2021-05-18_04-23-48PM/installActions20 21-05-18_04-23-48PM.log
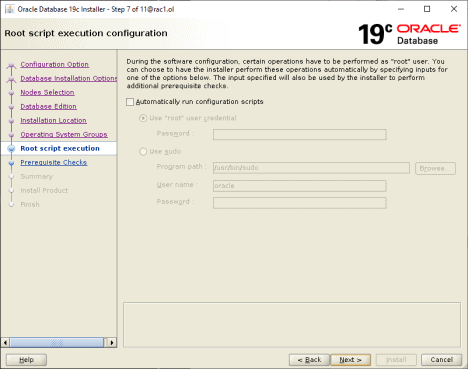
As a root user, execute the following script(s):
1. /u01/app/oracle/product/19.0.0/db_clone/root.sh
Execute /u01/app/oracle/product/19.0.0/db_clone/root.sh on the following nodes: [rac1, rac2]
b. Run the root.sh scripts on both rac nodes as root user
[root@rac1 ~]/u01/app/oracle/product/19.0.0/db_clone/root.sh


Check


/u01/app/oracle/product/19.0.0/db_clone/install/root_rac1.ol_2021-05-18_16-31-2 3-661178137.log for the output of root script


[root@rac2 ~]/u01/app/oracle/product/19.0.0/db_clone/root.sh


Check


/u01/app/oracle/product/19.0.0/db_clone/install/root_rac2.ol_2021-05-18_16-31-3 1-497851499.log for the output of root script
Reference: Doc ID 2565006.1