Security and management are essential when managing access to Windows machines in Azure. Using Microsoft Entra credentials achieves both and is a fairly straightforward setup. However, MFA (Multi-Factor Authentication) can complicate the process and require some additional steps to get it working.
MFA is an extra layer of security for logging into various resources, including Azure. While not required, it is highly recommended, and Microsoft has started enforcing it by default. This can be disabled for specific applications and users using Conditional Access policies. To ensure best practices and security, this should only be done in rare cases or for testing purposes.
To enable users to log into Azure virtual machines with their Entra credentials using MFA, follow these steps.
1. Enable Entra login via extension.
Creating a brand new VM:
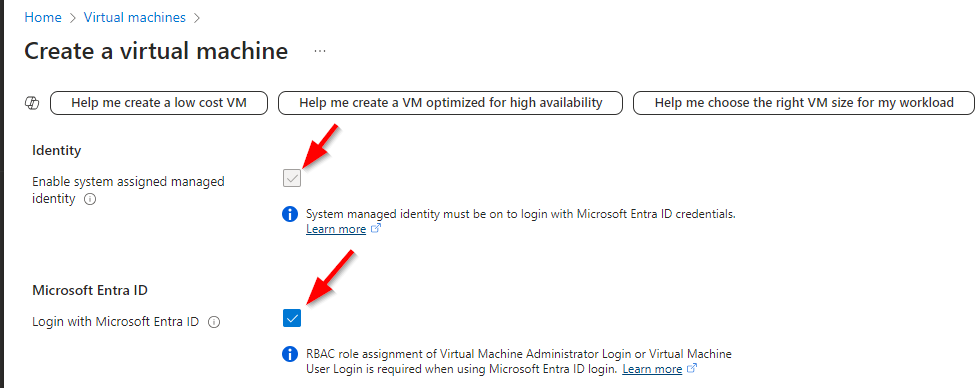
Entra login can be enabled automatically during the resource creation process. Under the Management tab, select Login with Microsoft Entra ID. This will also select the Enable system-assigned managed identity option. If, for some reason, this does not get checked, you can do it manually or enable it after the VM has been created.
Existing VM:
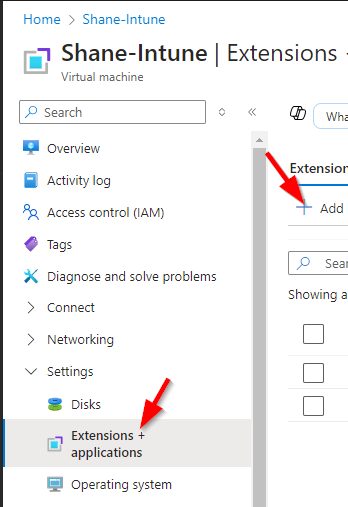
Browse to the VM and go to Settings -> Extensions + applications on the left menu. From there, click Add.
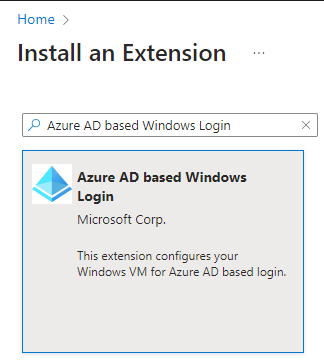
Search for Azure AD-based Windows Login. Select the extension and click Next -> Review + Create -> Create.
2. Verify extension is installed and update it if necessary.
Browse to the VM and go to Settings -> Extensions + applications on the left menu. You should see the extension listed as either AADLoginForWindows or AADLogin.
When installing the extension through the create resource process, it will often name the extension AADLoginForWindows and AADLogin when adding the extension to an existing VM.
If it shows that an update is available, select the extension and choose Update.

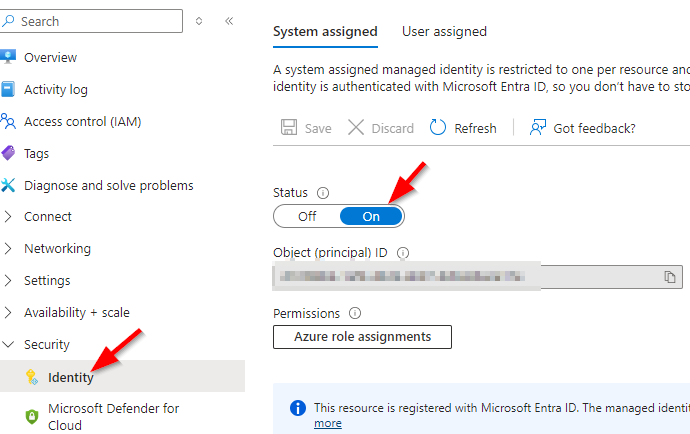
3. Enable system-assigned managed identity if not already On.
Browse to the VM and go to Security -> Identity. Toggle the switch to On and click Save.
4. Ensure users have proper roles to log in with Entra credentials.
Users must have one of the following role assignments:
Virtual Machine User Login
- Gives user permission to log in as a regular user
Virtual Machine Administrator Login
- Gives user permission to log in as an administrator.
These roles can be assigned directly to the user for each specific VM or to a group with the role assigned and added to the VM. The roles can also be inherited from roles assigned at the Subscription, Resource Group, or Management level.
To verify if a user has the proper permissions, browse to the VM, go to Access Control (IAM), and choose Check Access. Search for and select the user and verify that one of the above roles is assigned. If not, that user cannot log in with Entra credentials.

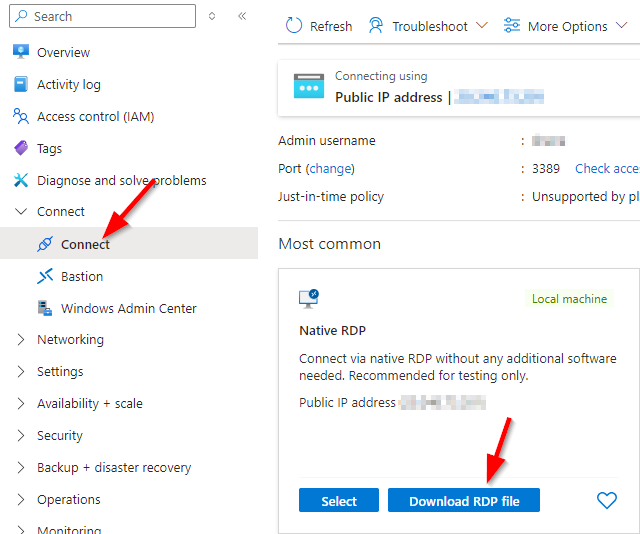
5. Download and modify the RDP file.
Browse to the VM and go to Connect -> Connect. Click on Download RDP file.
Find the downloaded RDP file and open it with a text editor.
The text will look similar to this:
full address:s:XXX.XXX.XXX.XXX:3389
prompt for credentials:i:1
administrative session:i:1
Username:s:admin username
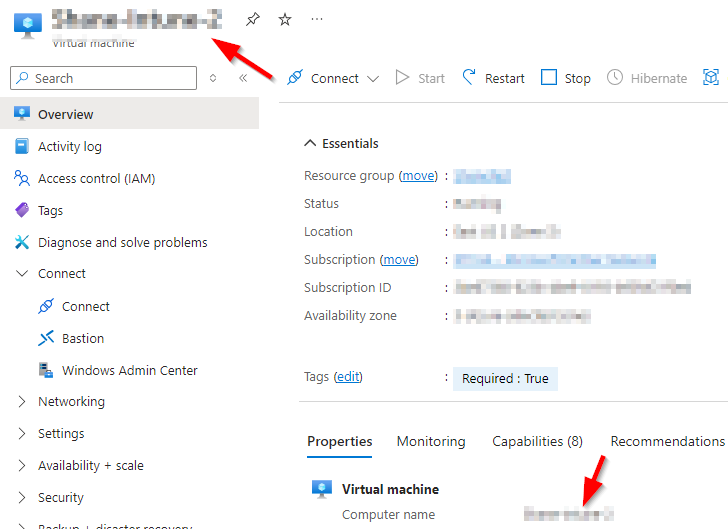
Azure requires the full address to be the name of the VM. It cannot be an IP address or an FQDN (Fully Qualified Domain Name). It must be the name of the VM itself. The name can be found on the Overview page of the VM.
Change the username to the UPN (User Principal Name) of the user that will be connecting.
Add this line to the end of the file:
Enablerdsaadauth:i:1
The final text in the RDP file should look similar to this:
full address:s:AzureVM Name:3389
prompt for credentials:i:1
administrative session:i:1
username:s:[email protected]
Enablerdsaadauth:i:1
6. Update hosts file.
Azure requires the VM name in the RDP file, which does not have a public DNS entry. This will cause the connection to fail because it cannot resolve an IP address. To work around this, add an entry to the host file in Windows.
The host file is found in the directory C:\Windows\System32\drivers\etc\
- Be careful when changing this file, as it can cause unintended issues.
Edit the host file with a text editor. Add a line to the end of the file in the format IP address {space} Azure VM Name using the public IP (or private if on VPN) and name of the VM.
- XXX.XXX.XXX.XXX AzureVM
This host file will look similar to this:
# Copyright (c) 1993-2009 Microsoft Corp.
#
# This is a sample HOSTS file used by Microsoft TCP/IP for Windows.
#
# This file contains the mappings of IP addresses to host names. Each
# entry should be kept on an individual line. The IP address should
# be placed in the first column, followed by the corresponding host name.
# The IP address and the host name should be separated by at least one
# space.
#
# Additionally, comments (such as these) may be inserted on individual
# lines or following the machine name denoted by a ‘#’ symbol.
#
# For example:
#
# 102.54.94.97 rhino.acme.com # source server
# 38.25.63.10 x.acme.com # x client host
# localhost name resolution is handled within DNS itself.
# 127.0.0.1 localhost
# ::1 localhost
XXX.XXX.XXX.XXX AzureVM
Now, when executing the RDP file, it should connect and prompt for the user’s Entra credentials.
Conclusion
Setting up Microsoft Entra credentials for logging into Azure virtual machines offers enhanced security and management, especially when combined with Multi-Factor Authentication. While the process can have a few complexities, particularly with MFA, following these steps ensures a secure and streamlined login experience. By enabling Entra login, configuring role-based access, and modifying the RDP file, you can secure access to your VMs while providing a smooth user experience.
For more information, please contact us!