
- Obtain the Oracle client binaries from Oracles site
- http://www.oracle.com/technetwork/database/enterprise-edition/downloads/database12c-win64-download-2297732.html
- Click on “Accept License Agreement”
- For 32 bit:
- Look for “Oracle Database Client (12.1.0.2.0) for Microsoft Windows (32-bit)”
- Click on “winnt_12102_client32.zip”
- For 64 bit:
- Look for “Oracle Database Client (12.1.0.2.0) for Microsoft Windows (x64)”
- Click on “winnt_12102_client.zip”
- You will be prompted to create an account or login if you already have one
- Download the file
- Place the Oracle binaries in C:\Oracle or whatever drive you choose
- Unzip the binaries to
- C:\Oracle\oracle_32 (32 bit)
- C:\Oracle\oracle_64 (64 bit)
- If you are going to install both 32 bit and 64 bit, install 64 bit first.
- Then follow the directions in this URL to get 32 bit installed (if you do not follow these directions, the setup install window will disappear): http://pivotaldata.blogspot.com/2016/09/the-disappearing-act-oracle-12c-client.html
32 BIT
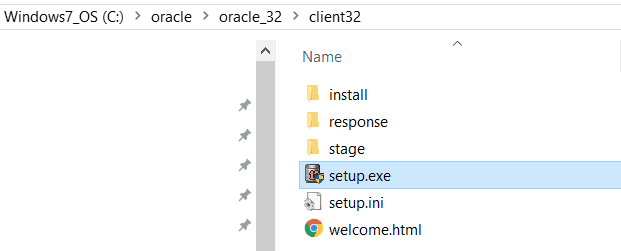
1. For 32 bit, go to C:\Oracle\Oracle_32\client\setup.exe and run this executable
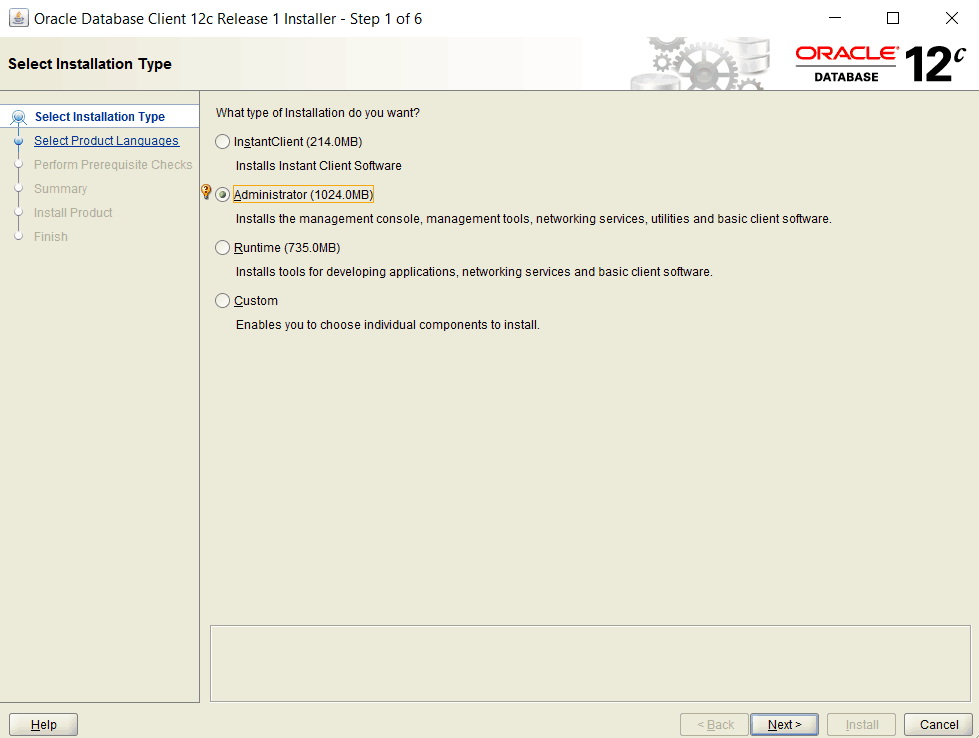
2.Select Installation type, click on Administrator and click Next
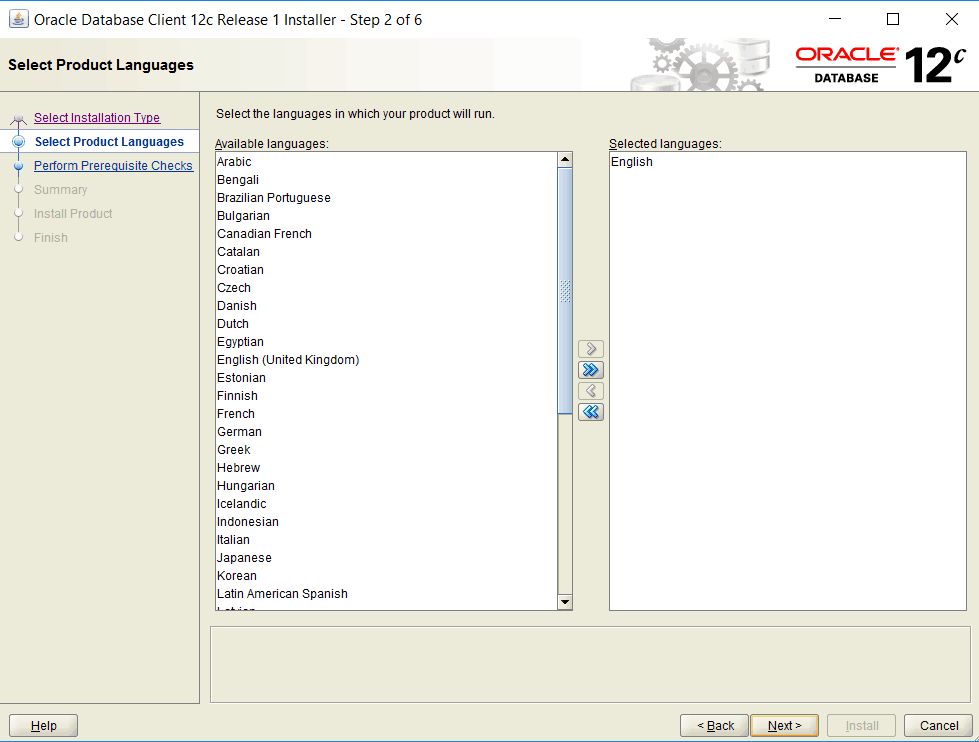
3. Select Product Languages, English will already be added (if you want other languages add them) and click Next.
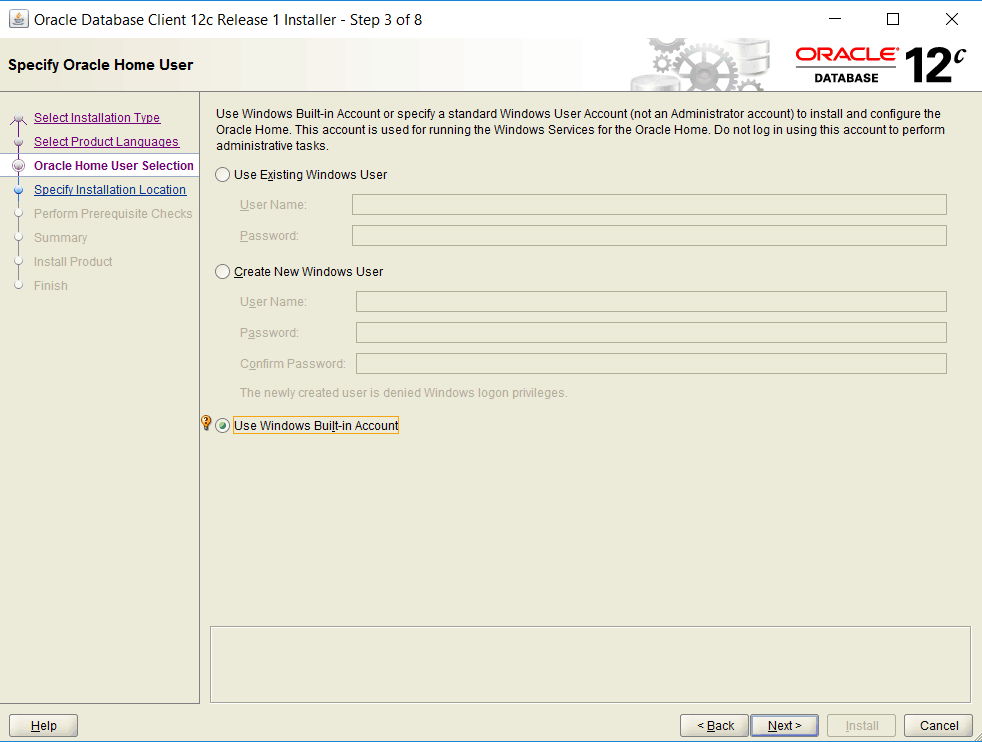
4. Specify Oracle Home User, use the default “Use Windows Built-in Account” and click Next.
5. Specify Installation Location, specify the correct location and click Next and click Install to install Oracle.
- Oracle Base is C:\Oracle
- Change the Software Location to C:\Oracle\product\12.1.0\client_32

6. For instructions on how to configure Oracle and test connections look at section Configure Oracle Client
64 BIT
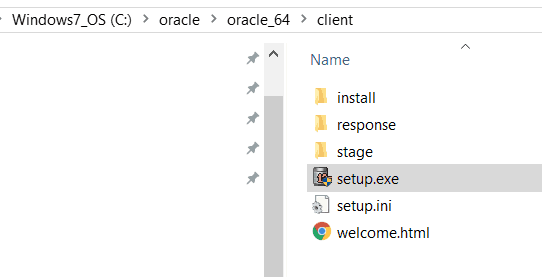
1.For 64 bit, go to C:\Oracle\Oracle_64\client\setup.exe and run this executable
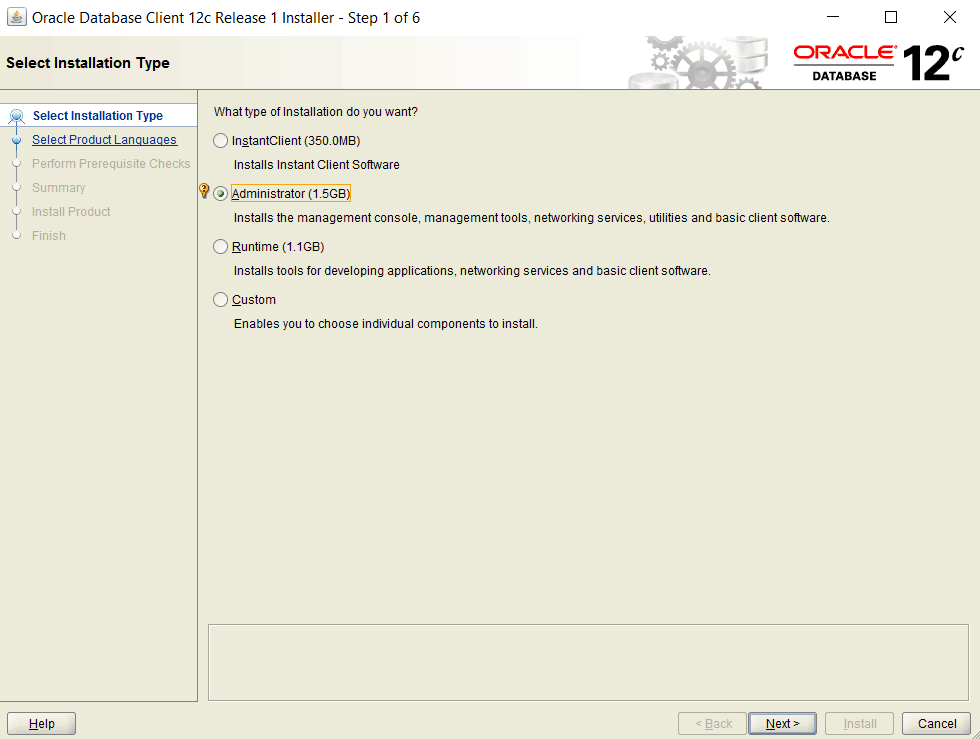
2. Select Installation type, click on Administrator and click Next
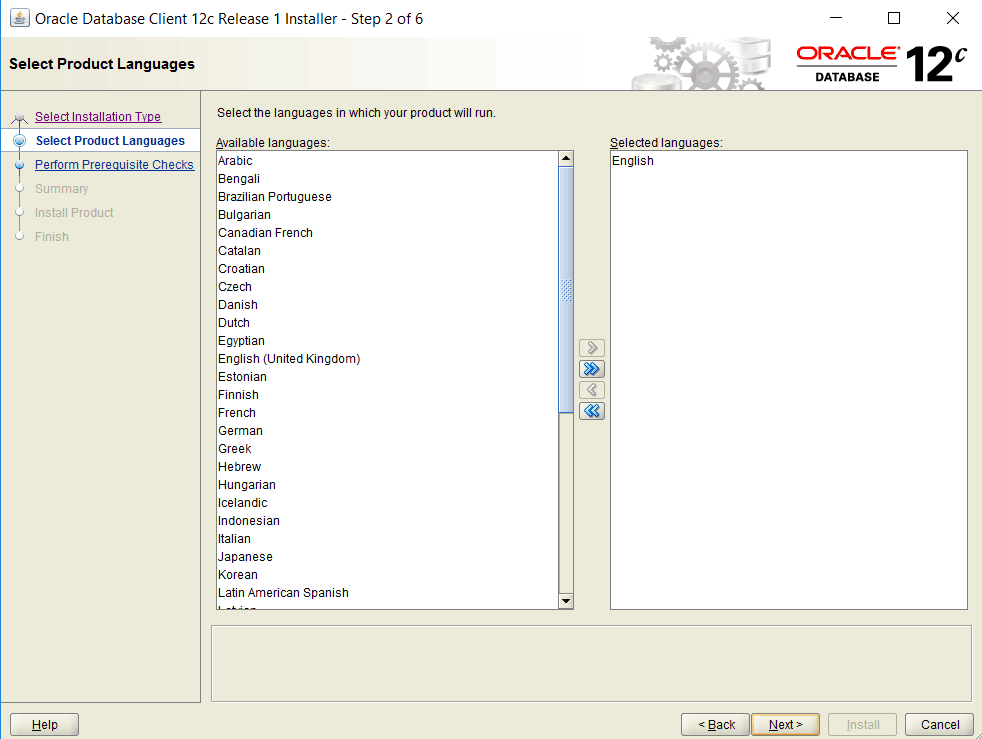
3. Select Product Languages, English will already be added (if you want other languages add them) and click Next.
4. Specify Oracle Home User, use the default “Use Windows Built-in Account” and click Next.
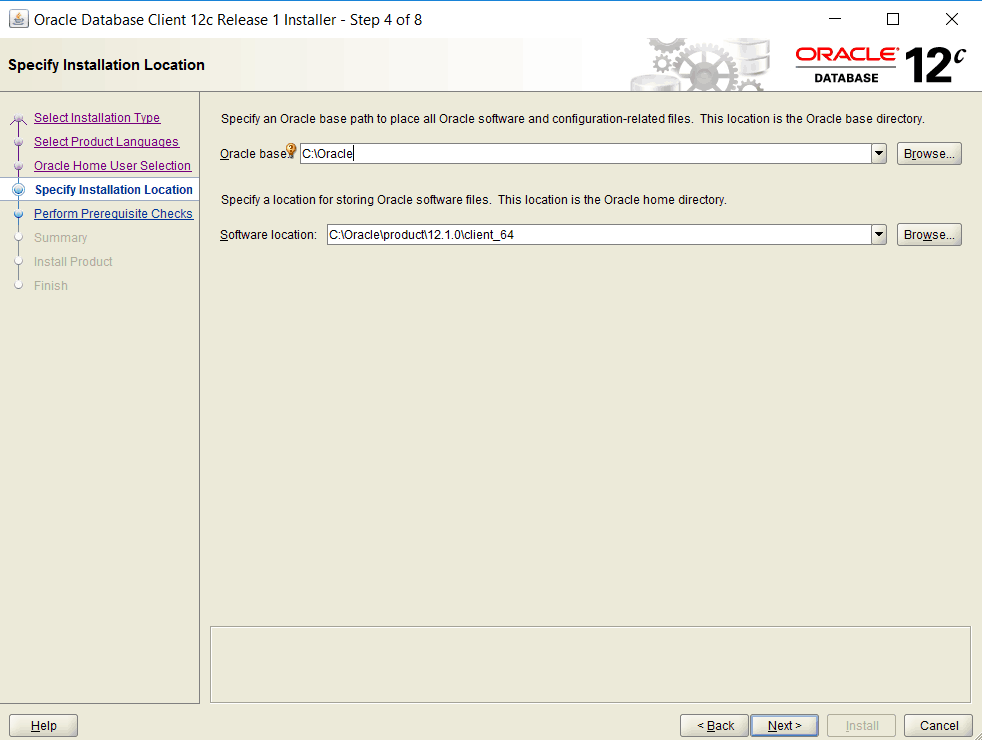
5. Specify Installation Location, specify the correct location and click Next and click Install to install Oracle.
- Oracle Base is C:\Oracle
- Change the Software Location to C:\Oracle\product\12.1.0\client_64
6. For instructions on how to configure Oracle and test connections look at section Configure Oracle Client
Configure Oracle Client
- Go to C:\oracle\product\12.1.0\client_64\network\admin\sample and copy the tnsnames.ora file and paste it to C:\oracle\product\12.1.0\client_64\network\admin OR create a blank file called tnsnames.ora in directory C:\oracle\product\12.1.0\client_64\network\admin.
- If the application provided you a tnsnames.ora entry place in C:\oracle\product\12.1.0\client_64\network\admin\tnsnames.ora
- To test tnsnames.ora entry. Open a command prompt and type the following. Where oracleinstance is the aliasname you added in tnsnames.ora. If you get an OK (## msec), then it has access to Oracle.
- Tnsping <oracleinstance>
- You can also login to oracle with the username and password that is provided to you by the Oracle DBA.
- Open a command prompt
- Type
- sqlplus username/password@oraclesource
- Type
- Open a command prompt