Azure Backup Service has risen from just being a simple flat file backup solution to an all in one sandbox for all your backup service needs. From BMR (Bare Metal Restore) to SQL databases, Azure Backup now gives you one centralized location to manage your data and infrastructure. In this article, we will cover several ways Azure allows you to backup your services.
The first one is directly through their Virtual Machine configuration setup. With just a click of a button, you can have your VM on Azure backup schedule as soon as your machine is created. (Please note that to use Azure Backup Services, it does require you to have Recovery Service Vault. You can either create prior to setting up your other resources that will use it or have Azure create while standing up the VM. To learn more about Azure Recovery Services Vaults, click here.)
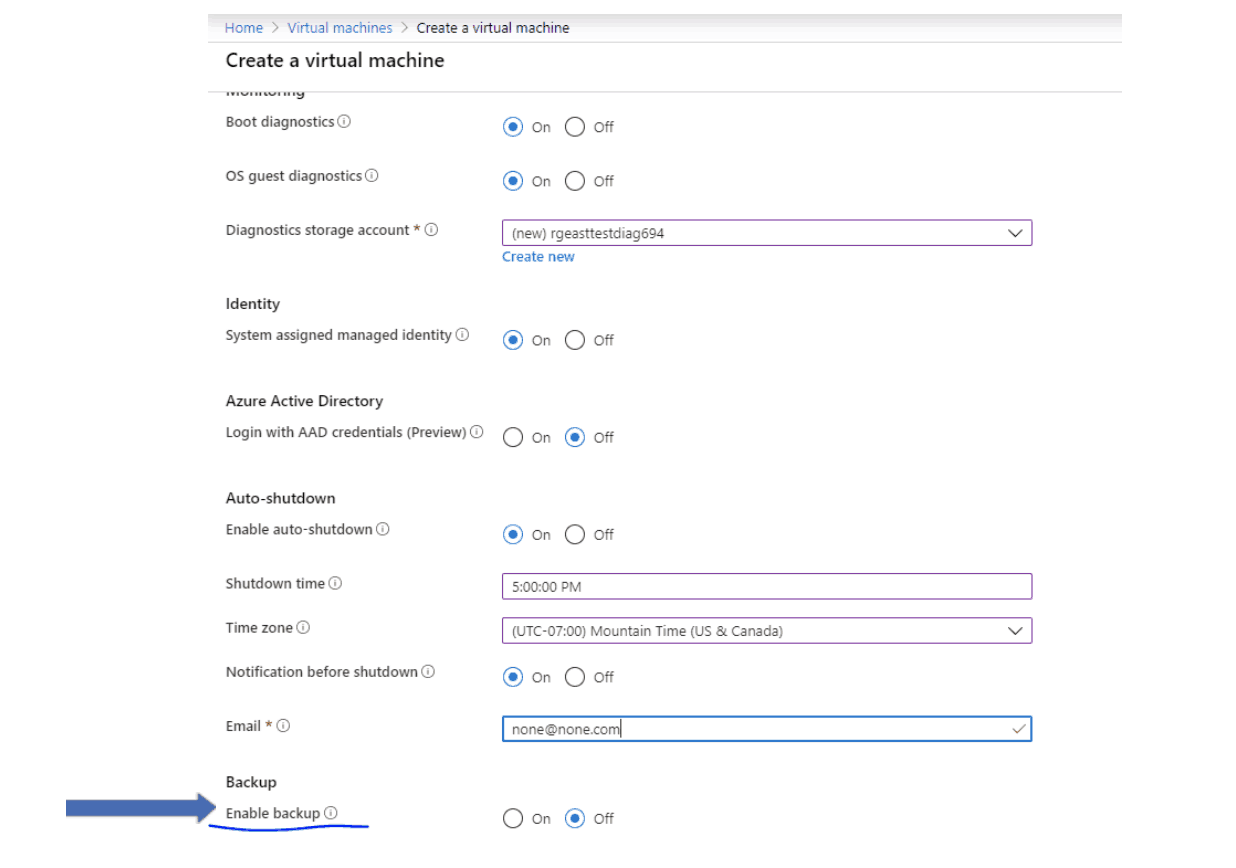
Fig 1.1 Enable Backup from VM config
Create Backup Through Azure Recovery Service Vault
You can enable Azure Backup Service through the Recovery Vault blade as well.
1. Search for Recovery Services Vaults in the Search bar in the middle of your portal.

Fig 1.2 Recovery Services Vaults search
2. Select the Recovery Vault you want to set your backups in. If you need to learn how to create a Recovery Services Vault in Azure, click here

Fig 1.3 Recovery Services Vault
3. Now that you are in the Recovery Services blade, you have two methods of setting up your backup. You can select the option on top of your page or select the Getting Started section of the recovery blade.
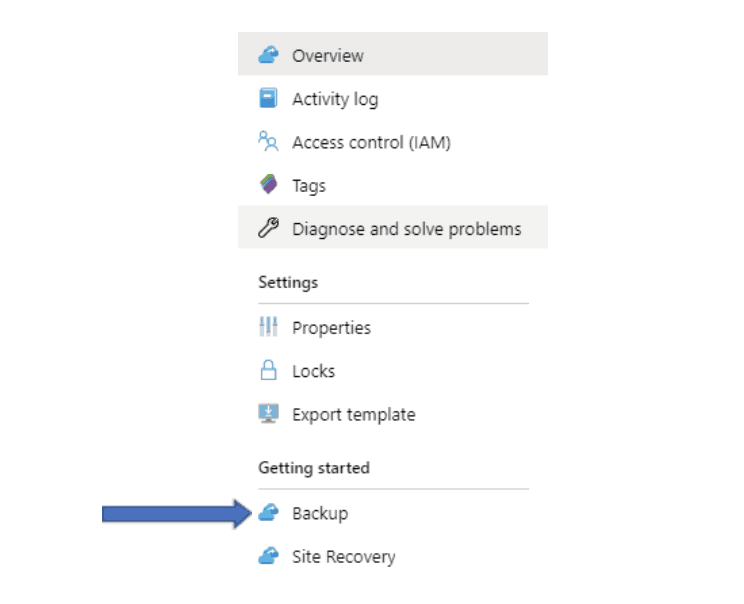
Fig 1.4 Recovery Services Vault Blade
Selecting the Option
1. If you select , it will bring you to a new section of the vault. This section has already selected defaults for and Azure workload for a VM (Azure/Azure Stack/On-Premise); however, if you click on the dropdowns, you will see what other workloads and backup items you can backup. There are quite a few selections, but we will focus on the Azure workload.
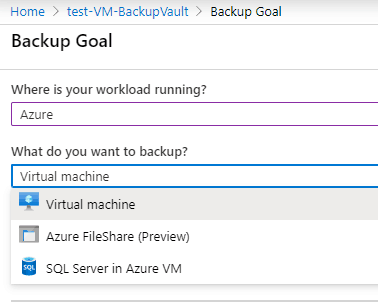
Fig 1.5 Azure Backup Workload options
2. Once you select the item you want to backup, simply select the option and this will bring you to the Backup policy blade. From here, you can select Azure’s default or create your own policy. Azure allows extensive customization of your backup jobs. We will choose the default option.
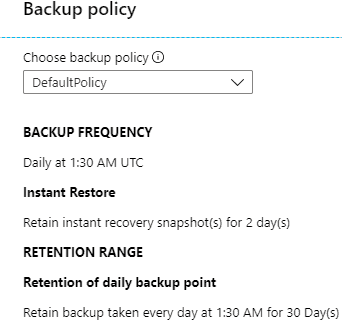
Fig 1.6 Default backup Policy
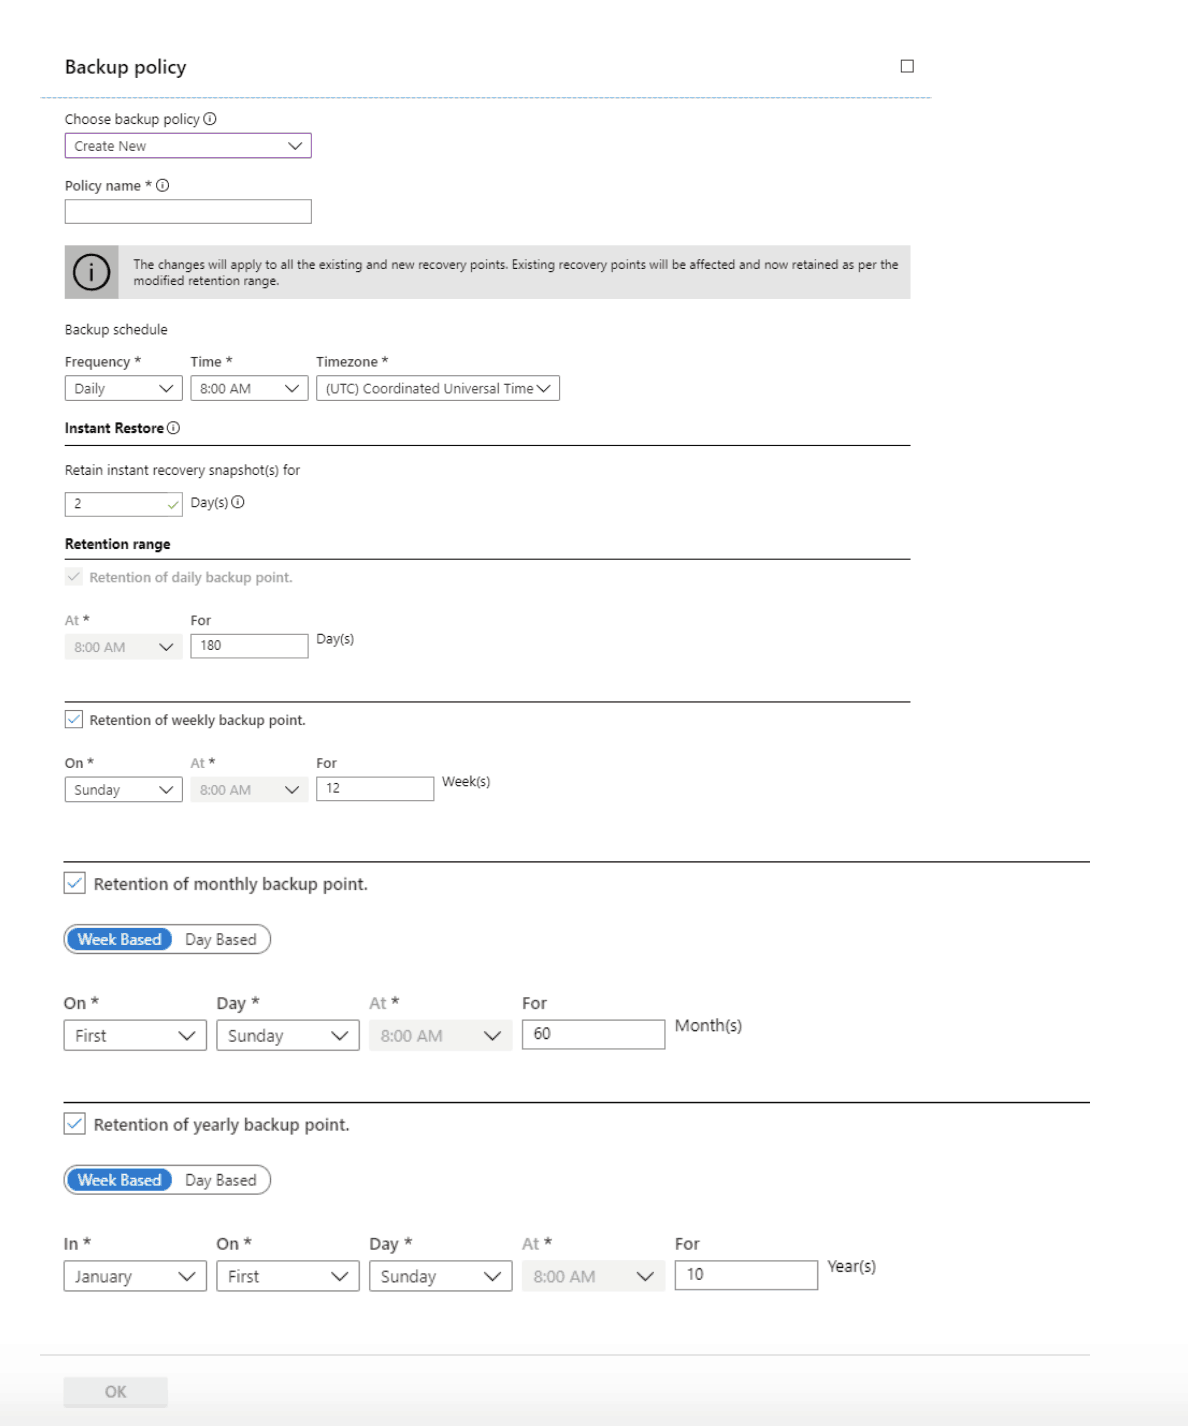
Fig 1.7 Custom Backup Policy
3. Once you have your policy in place, select , which will bring you to the selection of what items to apply to your backup policy. We will be backing up a test VM today. Once you have your items selected, click
again, then
, which will initiate Azure to apply the backup policy to your VM.

Fig 1.8 Backup Items
4. The backup configuration may take several minutes to complete. Once completed, you can check the status of your backup items in the Recovery Services Vault blade under Protected Items.
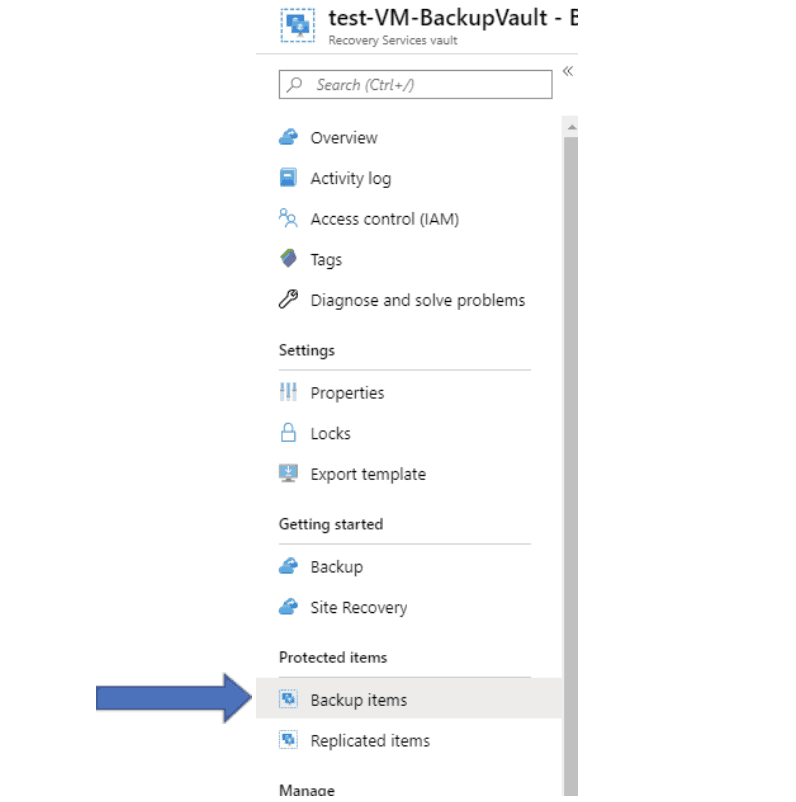
Fig 1.9 Recovery Services Vault blade
As you can see, Azure gives you a single pane of glass of all items being backed up in your vault.
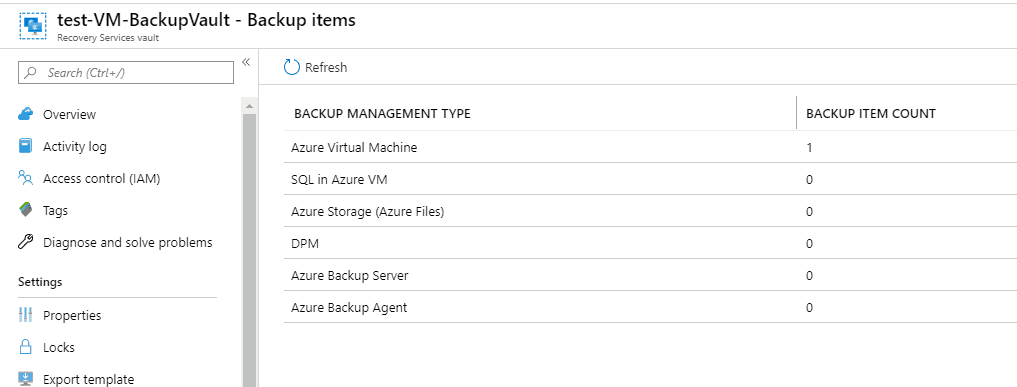
Fig 1.10 Backup items view
Select one of the backup items that have content to view more info regarding its backup.

Fig 1.11 Backup Item Detailed View
Select the item again in the backup detail view, which will bring you to your management interface. This is where you can start a backup off schedule, stop backups, file recovery, etc.
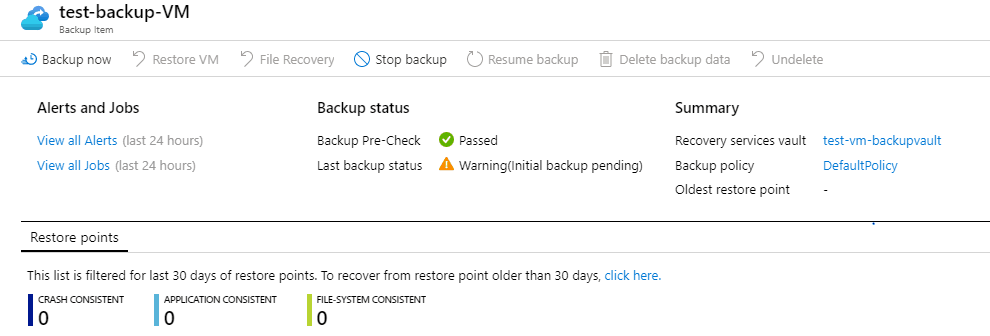
Fig 1.12 Backup Item Management
Configure Through Getting Started
1. Select the option in the Getting Started section. This, just like selecting the
option, will bring you to the workload section of the backup and you would continue as stated previously in the article.
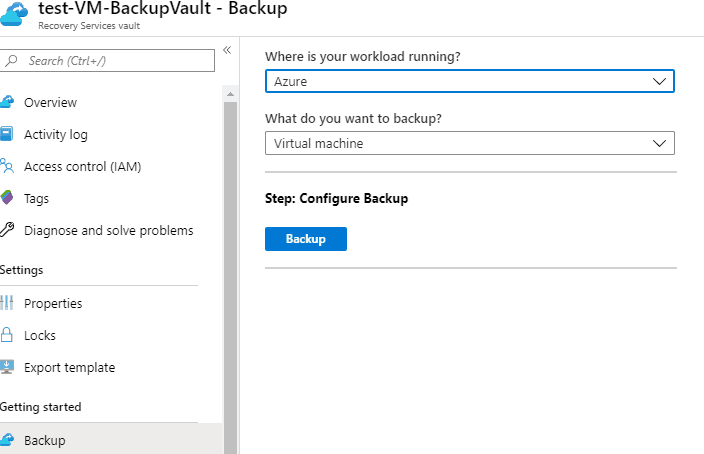
Fig 1.13 Configuring Azure Backup Workload
Azure Backup Configuration from VM
The final backup method is directly from the Azure VM blade.
1. Select the VM you want to back up. From there, scroll down to the Operations section of the VM blade and select Backup.
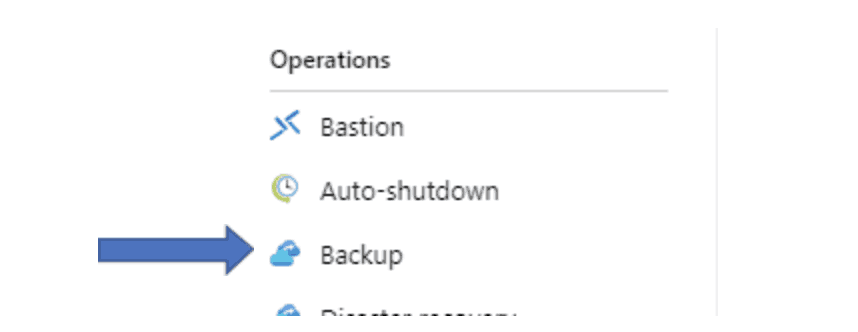
Fig 1.14 VM Backup blade option
2. Select whether you want to create a new Recovery Services Vault or use an existing. You can also select Azure’s Default policy or create a new one. Once you have selected your options, click to complete the backup operation.
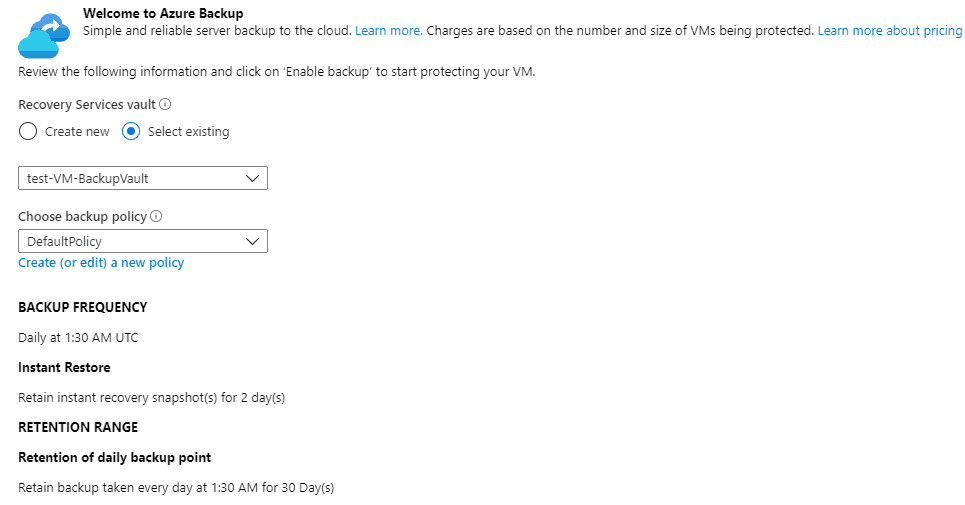
As you can see, Microsoft has gone above and beyond to make Azure Backup Services seamless while ensuring your data is constantly available.

