Overview
This doc is a general overview of symptoms to look for in the event of a potential virus alert from your service support product, or a user calls in regarding a potential virus. We’ll also cover what to do in the event of a potential virus on a PC. We are using Webroot and MalwareBytes for our examples in our process.
Symptoms:
Certain things you can look for or ask about are the following:
- Slow computer performance (taking a long time to start up or open programs)
- Problems shutting down or restarting
- Missing files
- Frequent system crashes and/or error messages
- Unexpected pop-up windows
- New applications (toolbars, etc.) that appear without you downloading them
- Overworked hard drive (the fan makes sounds and seems to be whirring and working hard when you aren’t doing much)
- Emails that send autonomously from your accounts
- Browser lag or redirects
- Malfunctioning antivirus programs or firewalls
Run heuristic virus scan on all drives:
This process can take hours depending on the amount of data on each drive.
- Open the SecureAnywhere interface by clicking the Webroot icon in the menu bar, then, from the drop-down menu, select Open Webroot SecureAnywhere.
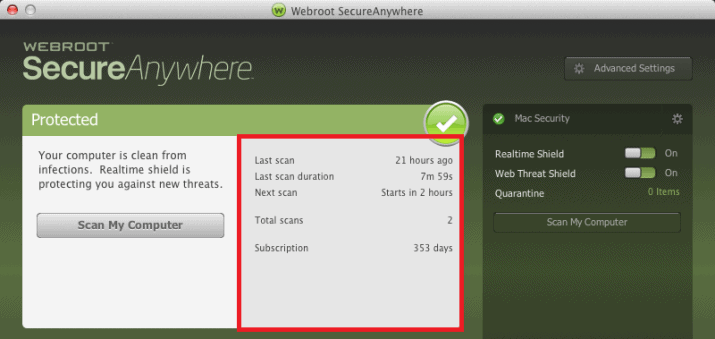
The scan statistics display in the middle of the Protected window.
To run a scan from the menu bar:
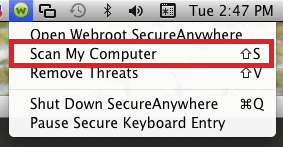
- From the menu bar, click the Webroot icon.
- From the drop-down menu, click Scan My Computer.
If SecureAnywhere locates threats, it opens a window that guides you through the quarantine process. For more information, see Managing Detected Threats.
To run a scan from the main window:
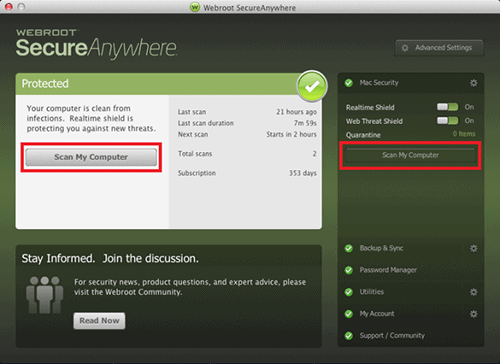
- Open the SecureAnywhere interface by clicking the Webroot icon in the menu bar, then, from the drop-down menu, select Open Webroot SecureAnywhere.
- Click the Scan My Computer button.
Managing Detected Threats:
Overview
If SecureAnywhere detects a threat or suspicious file, it prompts you to manage the item. Follow this procedure on how to manage any threats to your system.
To manage detected threats:
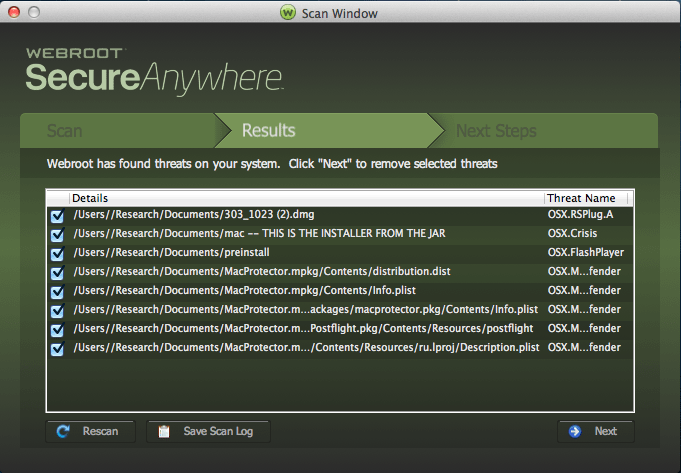
1. In the Results panel, review the list of file names.
2. Do either of the following:
- Keep the checkboxes selected, so items will be moved to quarantine.
- Deselect any checkbox for which you recognize a filename and know that you need it to run an application.
For any items you deselect, SecureAnywhere restores them to their original locations.
Note: Do not restore a file unless you are absolutely sure it is legitimate.
3. On the bottom right of the window, click the Next button.
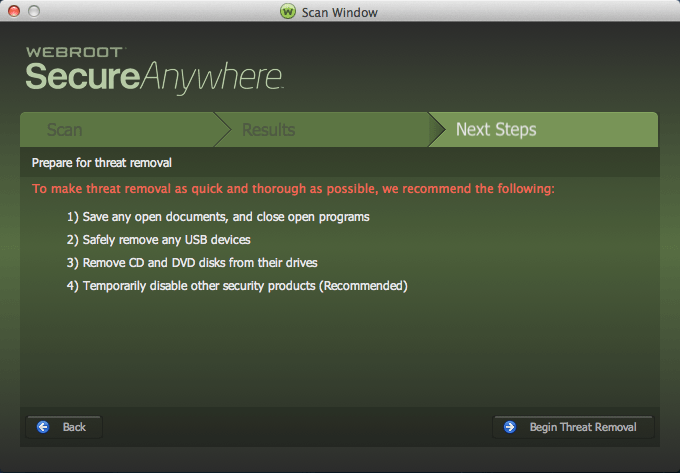
Note: It is recommended that you click the Next button to move all items to quarantine, where they are rendered inoperable. If you determine later that you need a file, you can restore it to its original location.
4. On the Next Steps panel, click the Begin Threat Removal button. SecureAnywhere runs a follow-up scan again to make sure all threat traces are removed. If you cancel the scan, the main panel remains in a Threats Detected state and prompts you to run a scan.
Second Opinion:
Always good to have a second antivirus scanner available. Download the latest Malwarebytes free trial Here.
Run a Scan:
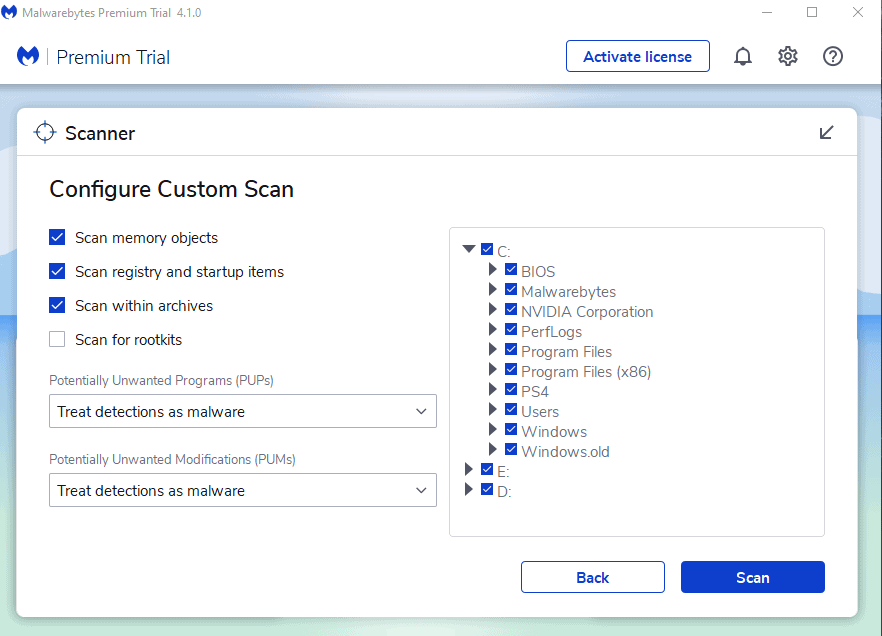
The Scan Pane is the introduction to scan-related options in the program. When you click Scan in the Menu Pane, you will see the screen shown below.
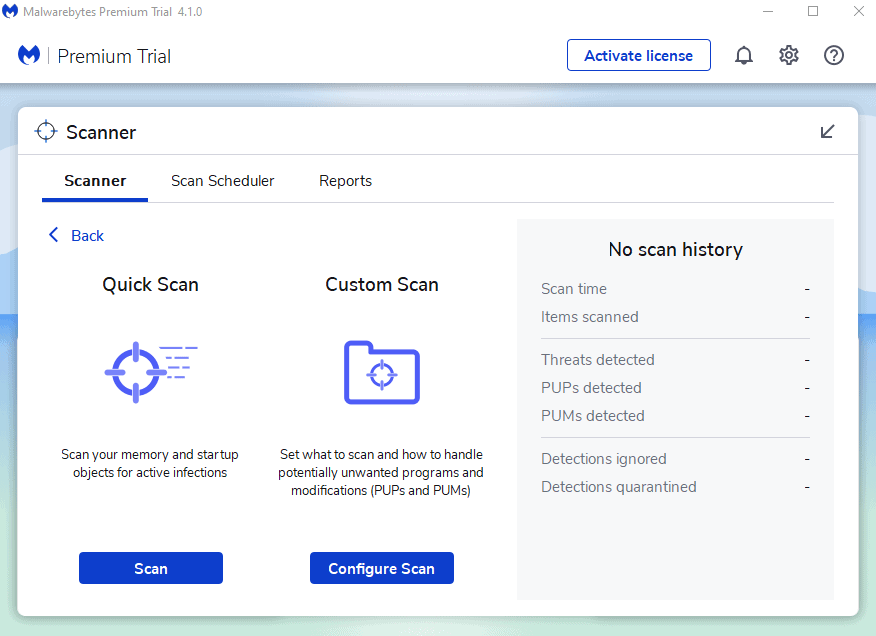
- Select Configure Scan.
- Ensure you select all drives and leave everything else default. (You can also do incremental scanning from a file/folder level). Click Scan to begin.
